

Saved filters let you capture a filter, sort and column configuration as a reusable view, then access it any time and share it with others.
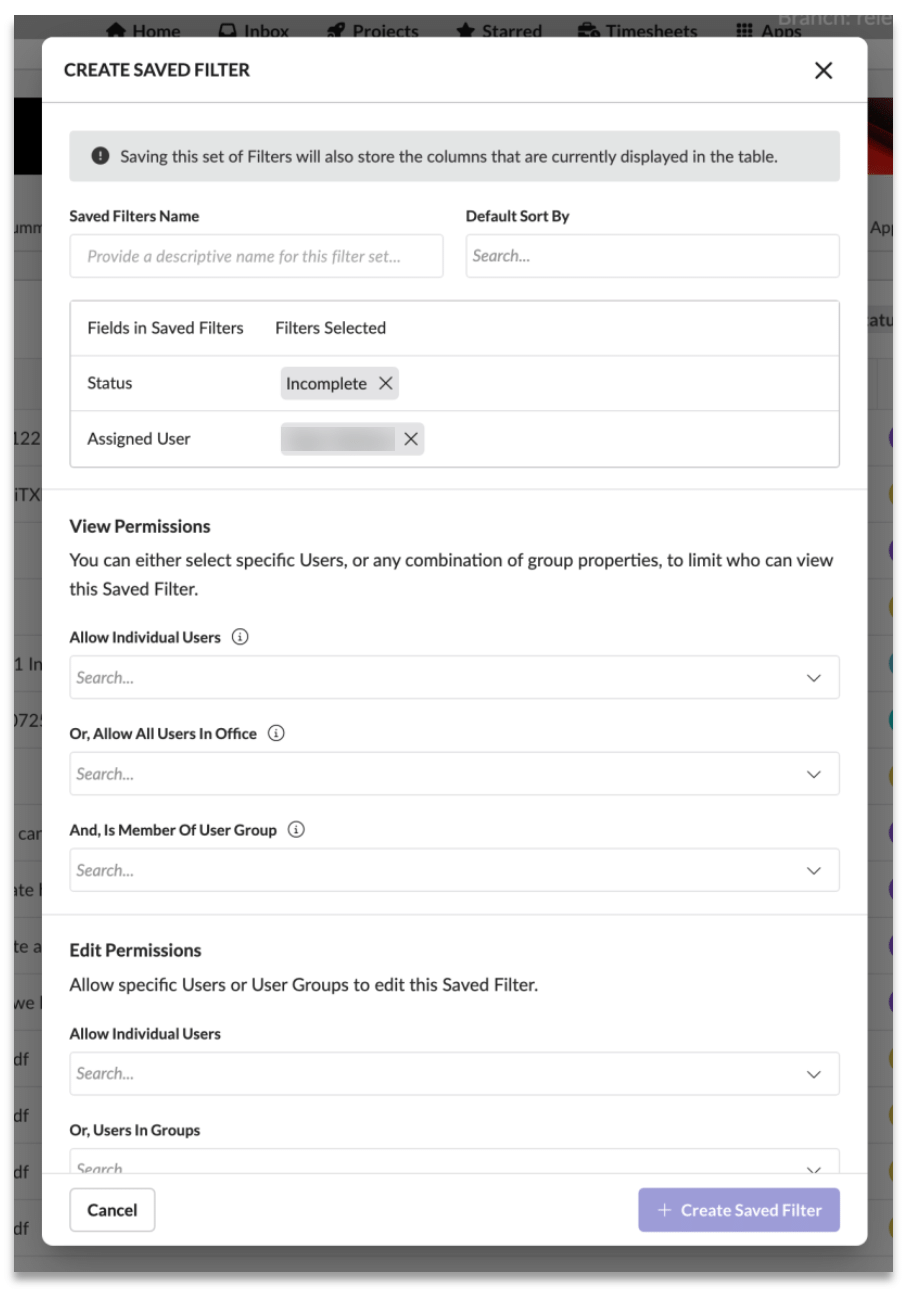
To create a saved filter
- Set up the view you want: apply your filters, sorting and column layout.
- Open the filter panel and select Create Saved Filter.
- Give it a descriptive name and, optionally, a default sort.
- Review the fields and filters included. Saving also stores the columns currently displayed.
- Set View Permissions and Edit Permissions to control who can see and change the filter (specific users, everyone in an office, or members of a user group).
- Click Create Saved Filter.
To use a saved filter
- Under Saved Filters in the left navigation, click the view you want.
- It loads automatically, applying the saved filters, sorting and columns.
Why it matters: Saved filters enable role-based working views and keep teams consistent and efficient. They’re the foundation of WIP / hotsheet-style management (see The Task List Widget).