Once a Project has been created, many of the settings chosen in the Project Wizard (or Job Builder) can still be updated via the Edit Project Settings page.
Change Project settings after Creation
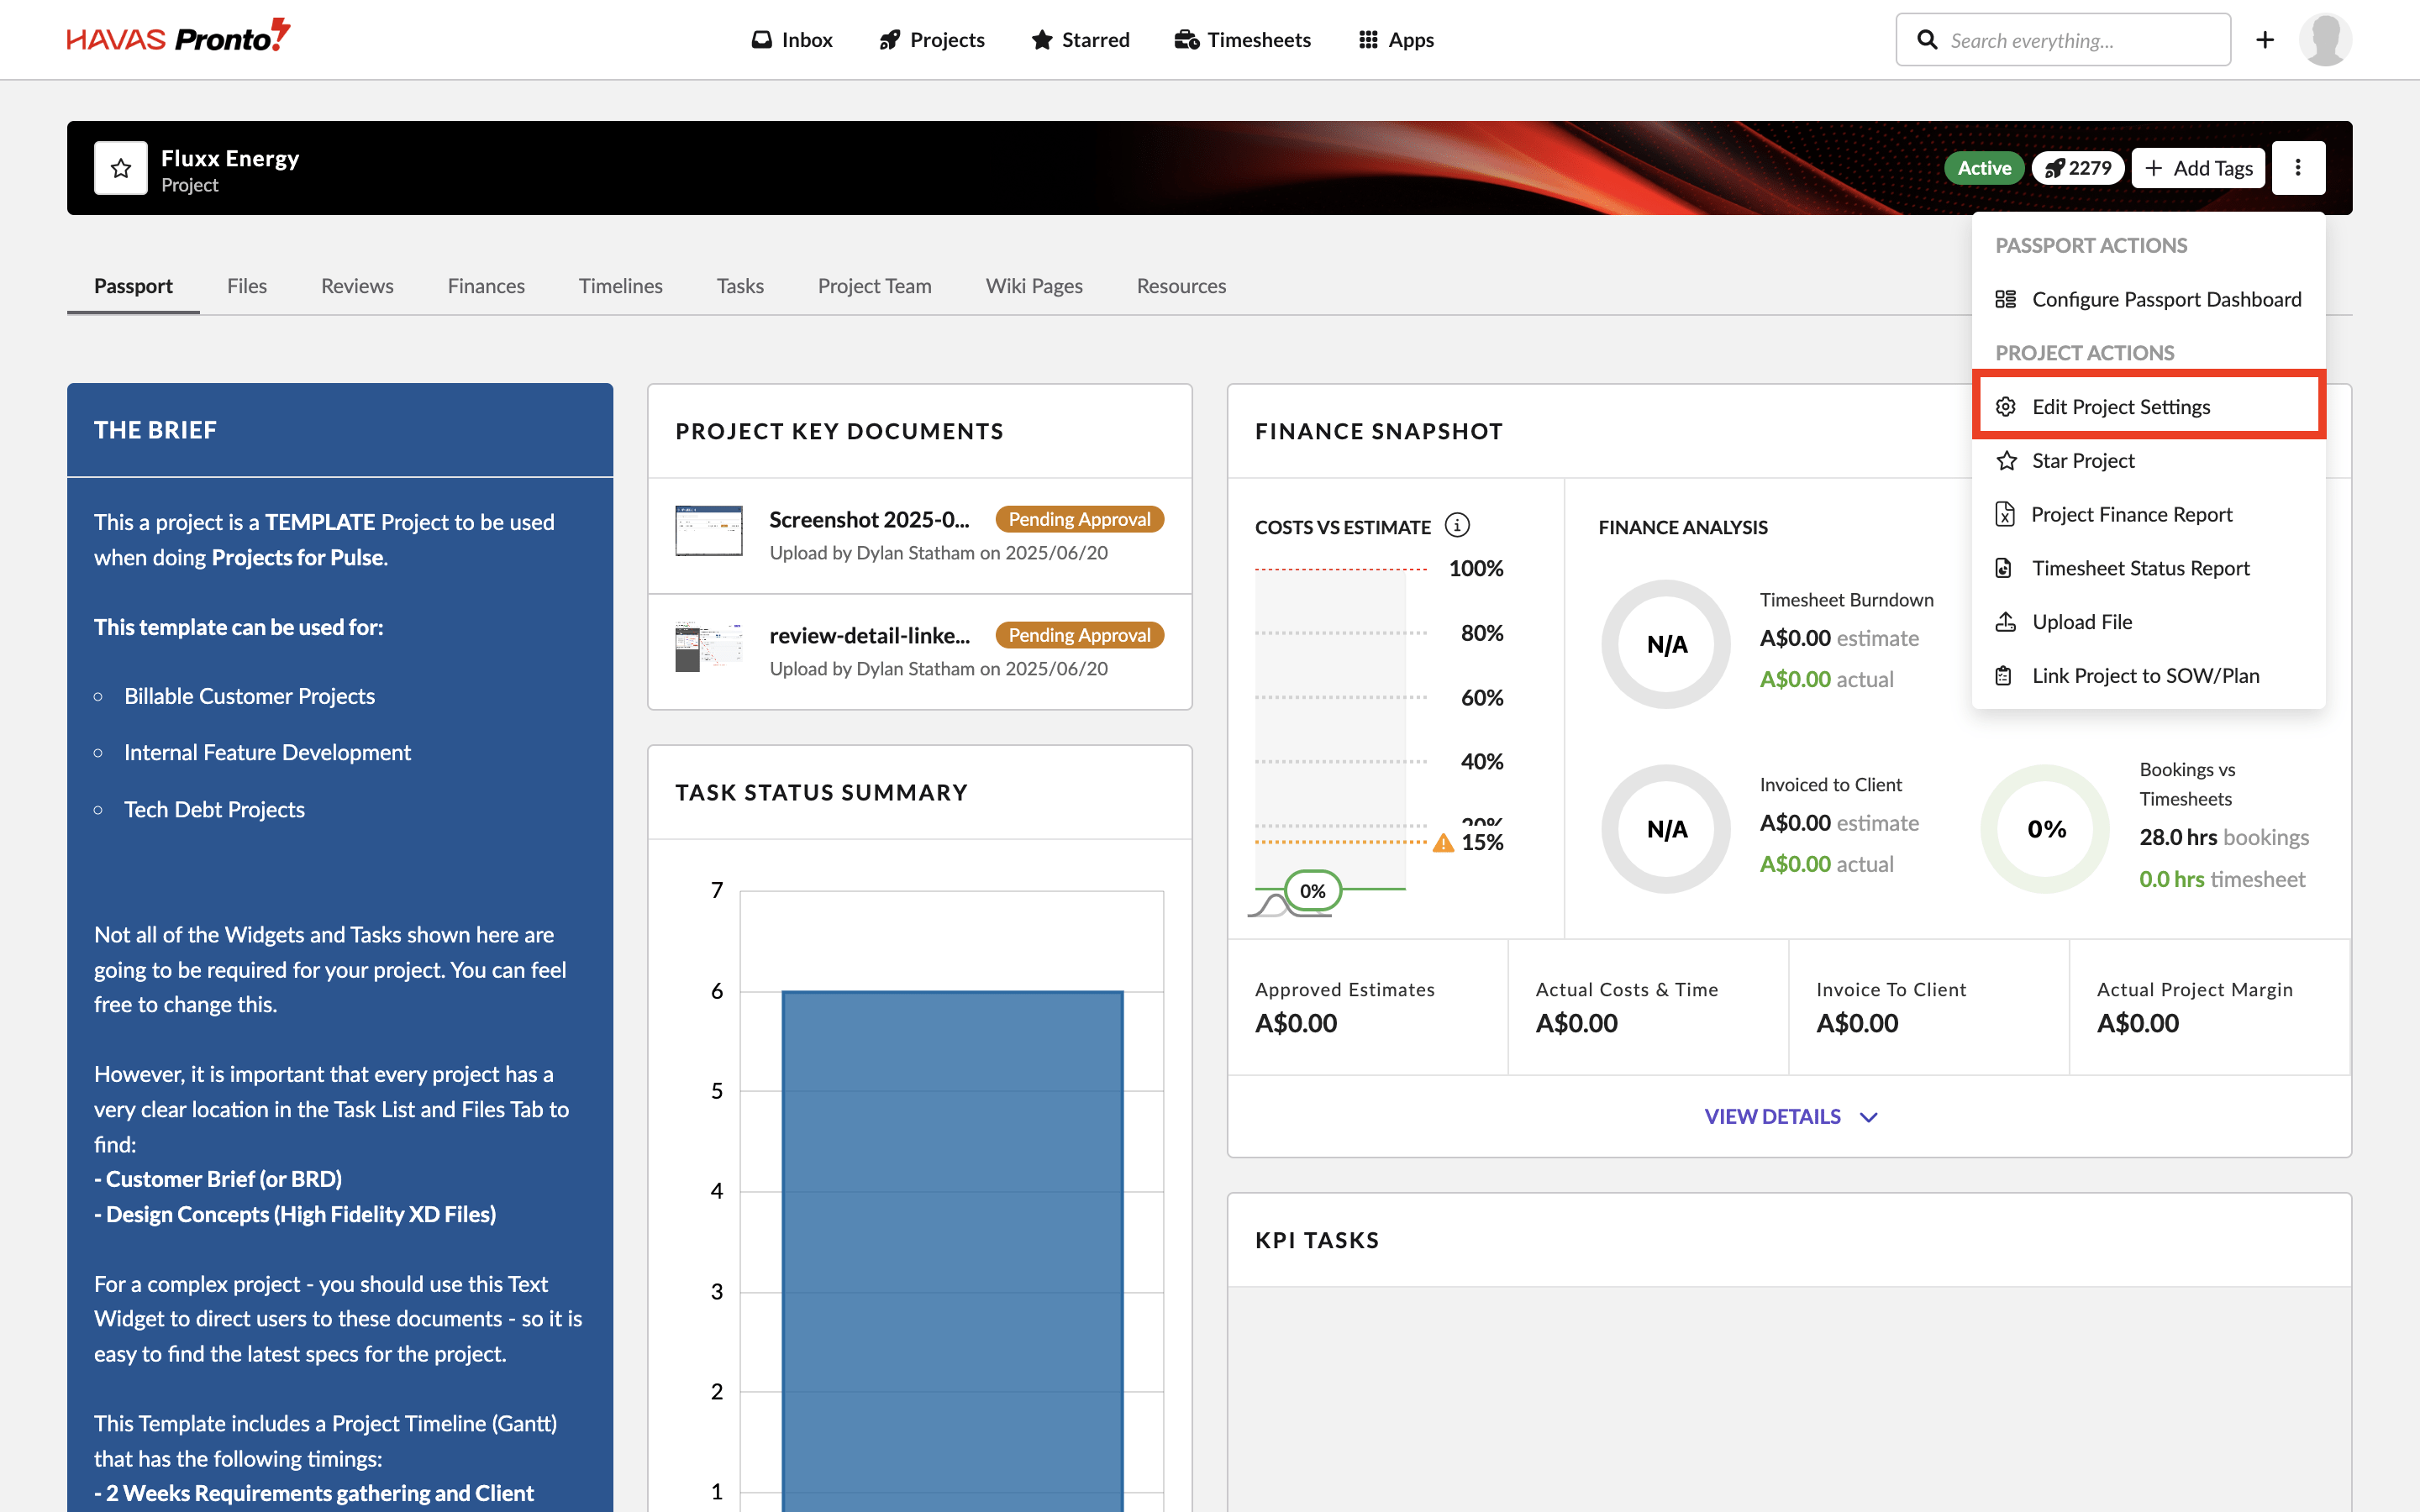
To access the Project Settings:
- Go to the Project Dashboard for the Project you want to update.
- Click the Project Actions button and select Edit Project Settings.
- You’ll be taken to the Project Settings page.
Available Project Settings
The settings on this page allow you to update many of the properties of the Project.
Available Settings:
1. Office
-Which Office does the Project belong to?
-If the Project already has Files or Finance Documents, you may not be able to change the Office.
-To move a Project to another Office, you’ll likely need to create a new Project in the right Office, then move the Tasks and Files across manually.
2. Project Title
-This is the title that appears in your Job List, search results, and throughout Project communications.
-In most cases, it’s editable — unless your Office is using automated naming rules.
3. Job Number
-This is the unique ID used to reference the Project.
-In many Offices, it’s auto-generated and can’t be changed.
-If the field is editable, you’re free to customise it to match your internal naming conventions.
4. Project Manager
-This sets the primary contact for the Project.
-It’s usually the actual Project Manager, but you can assign any User with the Manage Projects permission.
-This person receives system reminders and notifications linked to the Project.
5. Project Status
-This reflects the current state of the Project.
-If it’s underway, make sure it’s marked as Active.
6. Project Type
-Used for reporting only.
-Choose the option that best reflects the kind of Project you’re running.
-Only Pronto Admins can update the available options
7. Brand
-Links your Project to a specific Brand — which acts like a customer or product category.
-Used to group Projects and power reports.
8. Template
-Use this to turn your Project into a reusable Template.
-Others can then use it when starting new Projects via the Project Wizard.
-You can toggle this on or off anytime without affecting the current Project or any created from it.
9. Brief
-A free-text field for describing your Project.
-It displays in the Project Details widget on the Dashboard by default.
-Useful for giving your team a quick overview of what the Project is about.
10. Currency
-Sets the default currency for this Project.
-It only impacts reporting and new Finance Documents.
-Changing it won’t affect existing financial data.
11. Parent Project
-In some setups, you can group Projects under a Parent Project.
-This is used for reporting purposes only.
12. Project Attributes
-Pronto supports custom metadata fields called Project Attributes.
-These are configured by your Pronto Administrator.
-They help you organise and report on Projects with extra detail tailored to your Office or Brand.