The first step in setting up your workspace is to create your Offices.
Offices are essential- they act as the home base for your Users, Projects, and Permissions.
Two-step setup:
- Quick Create an Office
- Edit the Office to access advanced settings
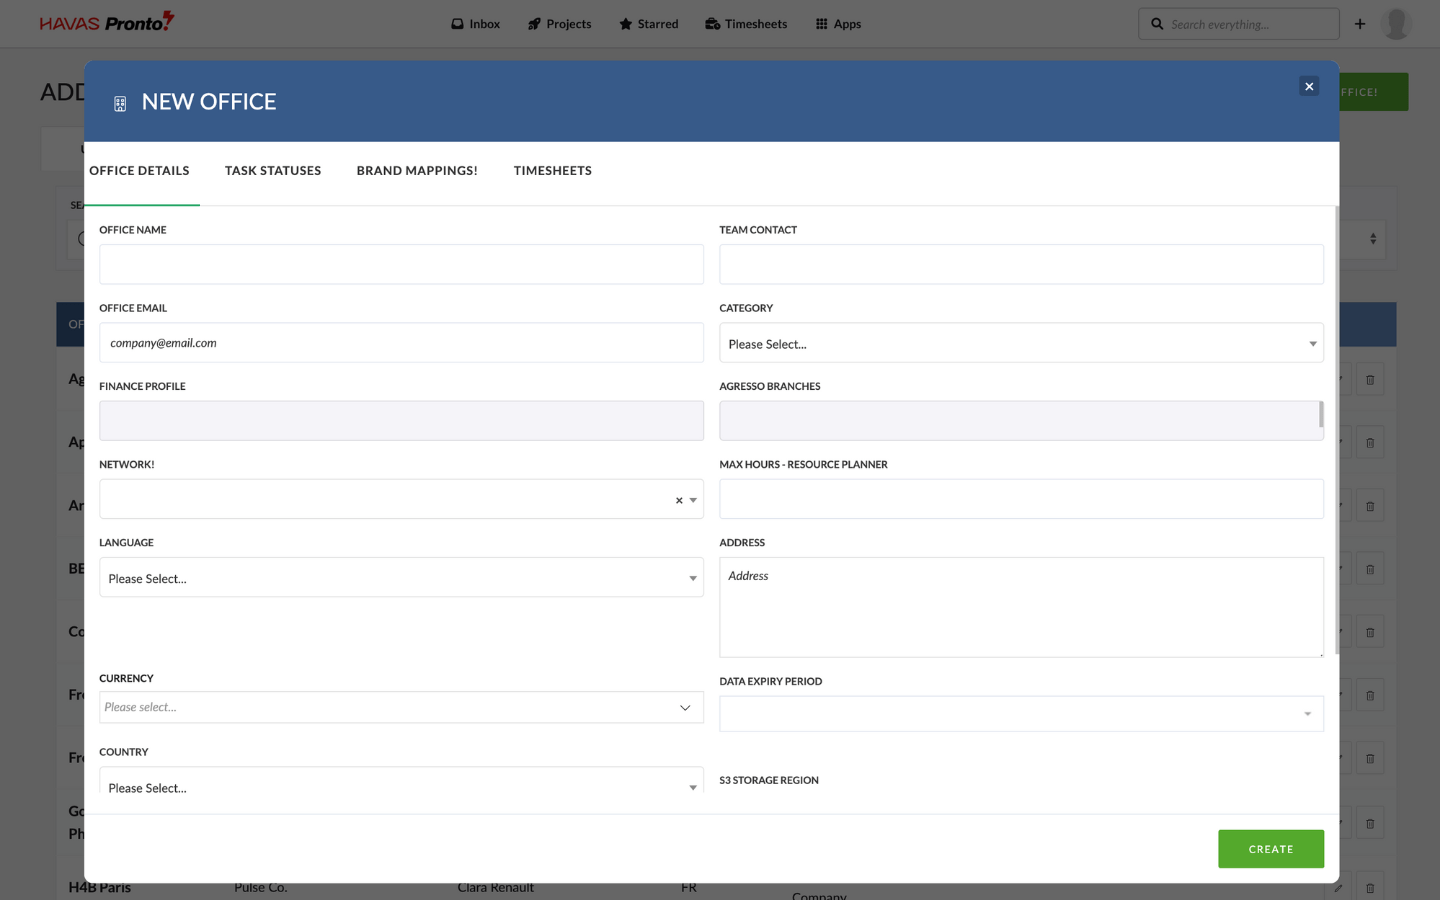
Office Quick Create
Use the Quick Create form to get your initial Offices up and running fast.
- Go to Address Book > Offices
- Click Create Office (requires Manage Office permission)
- Only two fields are required:
- Office Name
- Contact Email
This information is very useful when managing Users and Projects.
Tip: Set the category to help classify the office:
Edit Office for additional settings
Once the Office is created you can edit its settings to control:
- User permission overrides
- Timesheet and PTO rules
- Brand mappings
- Finance behaviour
- Default dashboards and templates
To edit, go to Address Book > Offices, then click Edit on the Office you’d like to update.
Advanced settings for Offices are:
| Setting | Description |
|---|---|
| Brand Mapping | Control what Brands will be available to the Users in this office for creating Projects in the Project Wizard. |
| Timesheet Settings | Enable/Disable Timesheets for the Users in the office. Set default rules for Minimum Time entry and Timesheet Reminders. |
| Holidays | Set the Default Holidays (Non-Working-Days) for the Office. Holidays will show on the User’s timesheets as a reminder. |
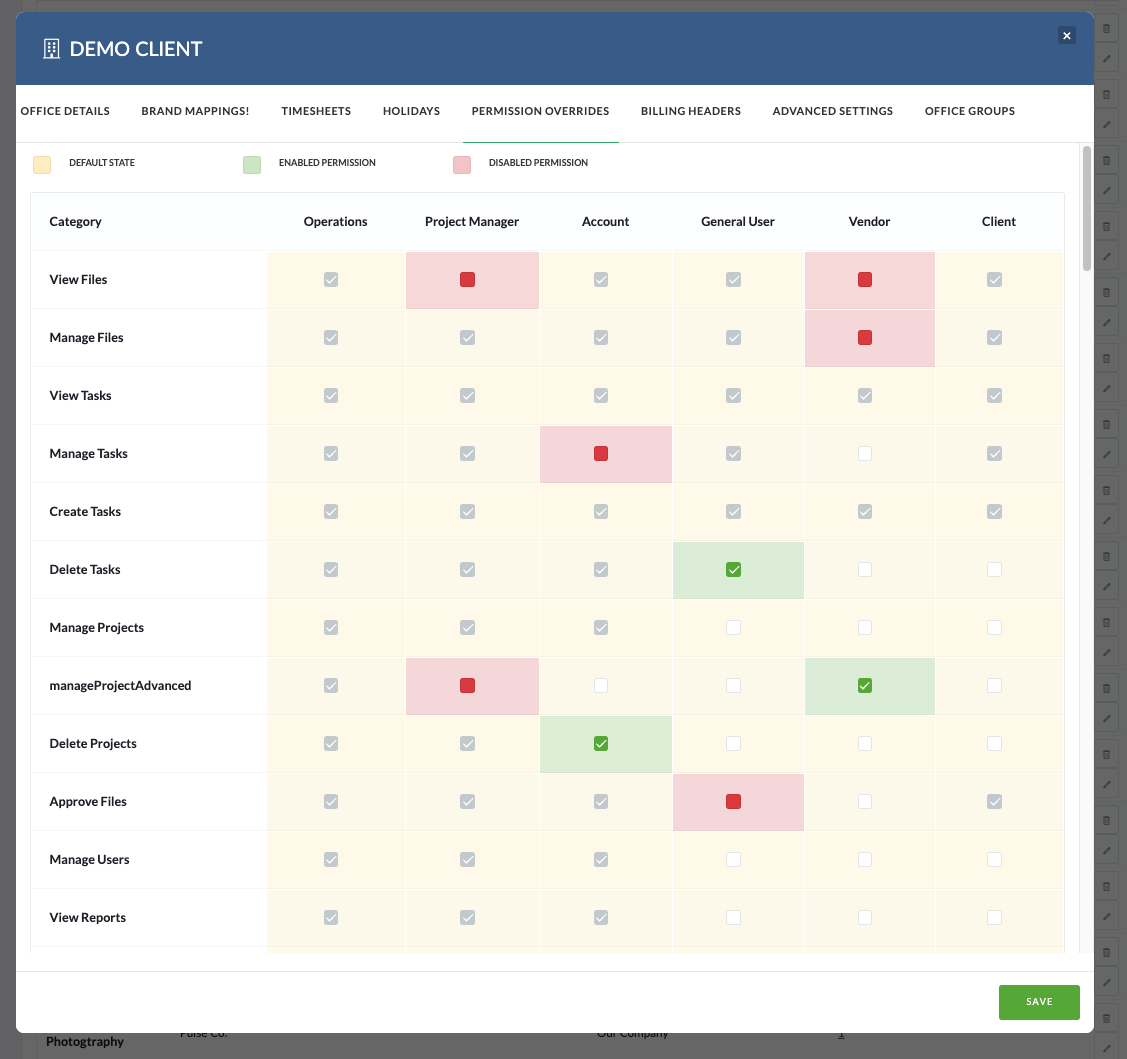
| Permission Overrides | Set the Features available as ‘User Permissions’ for ‘Permission Profiles’ in the Office. |
| Billing Headers | Set the formatting and logo for the Headers to be used in Finance Document PDFs. |
| Advanced Settings | Manage Finance settings relating to Agresso Integration and Finance Workflow. |
| Office Groups | Set the Default Groups for an Office to be used in the Standard Workflows. eg: Finance Managers, Reporting Group, PTO Approvers, Alien Users Group. |