Pronto’s Timeline view includes powerful formatting tools that help you visually organise and prioritise your work. You can apply colours and text styling to rows or cells in the Gantt table, making it easier to highlight key phases, deadlines, or team responsibilities at a glance.
- Intuitive drag-and-drop performance with a dedicated drag handle
Tasks can be moved easily using a clear drag handle, reducing accidental edits and improving overall responsiveness in both single and multi-task interactions.
- Locked columns for important Timelines data
The Title, Start/End Dates, Duration, and Predecessor columns are locked, so you can scroll across large timelines while keeping essential details in view for better planning and coordination.
- Single click scroll to date
Jump to any date on the timeline with a single click—no more endless scrolling. Ideal for navigating large projects or quickly syncing with today’s date.
- Copy and paste of the Gantt table to Excel, Notes, Outlook etc.
You can copy table data directly from the Gantt view and paste it into tools like Excel, Outlook, or Notes for reporting, meetings, or quick reference—preserving formatting and structure.
1. Accessing the Formatting Tools
To get started:
- Open any Timeline in Pronto.
- If there are no items in the Timeline yet, the formatting tools (paint bucket and T icons) will be disabled
- Add at least one item to the Timeline to activate the tools.
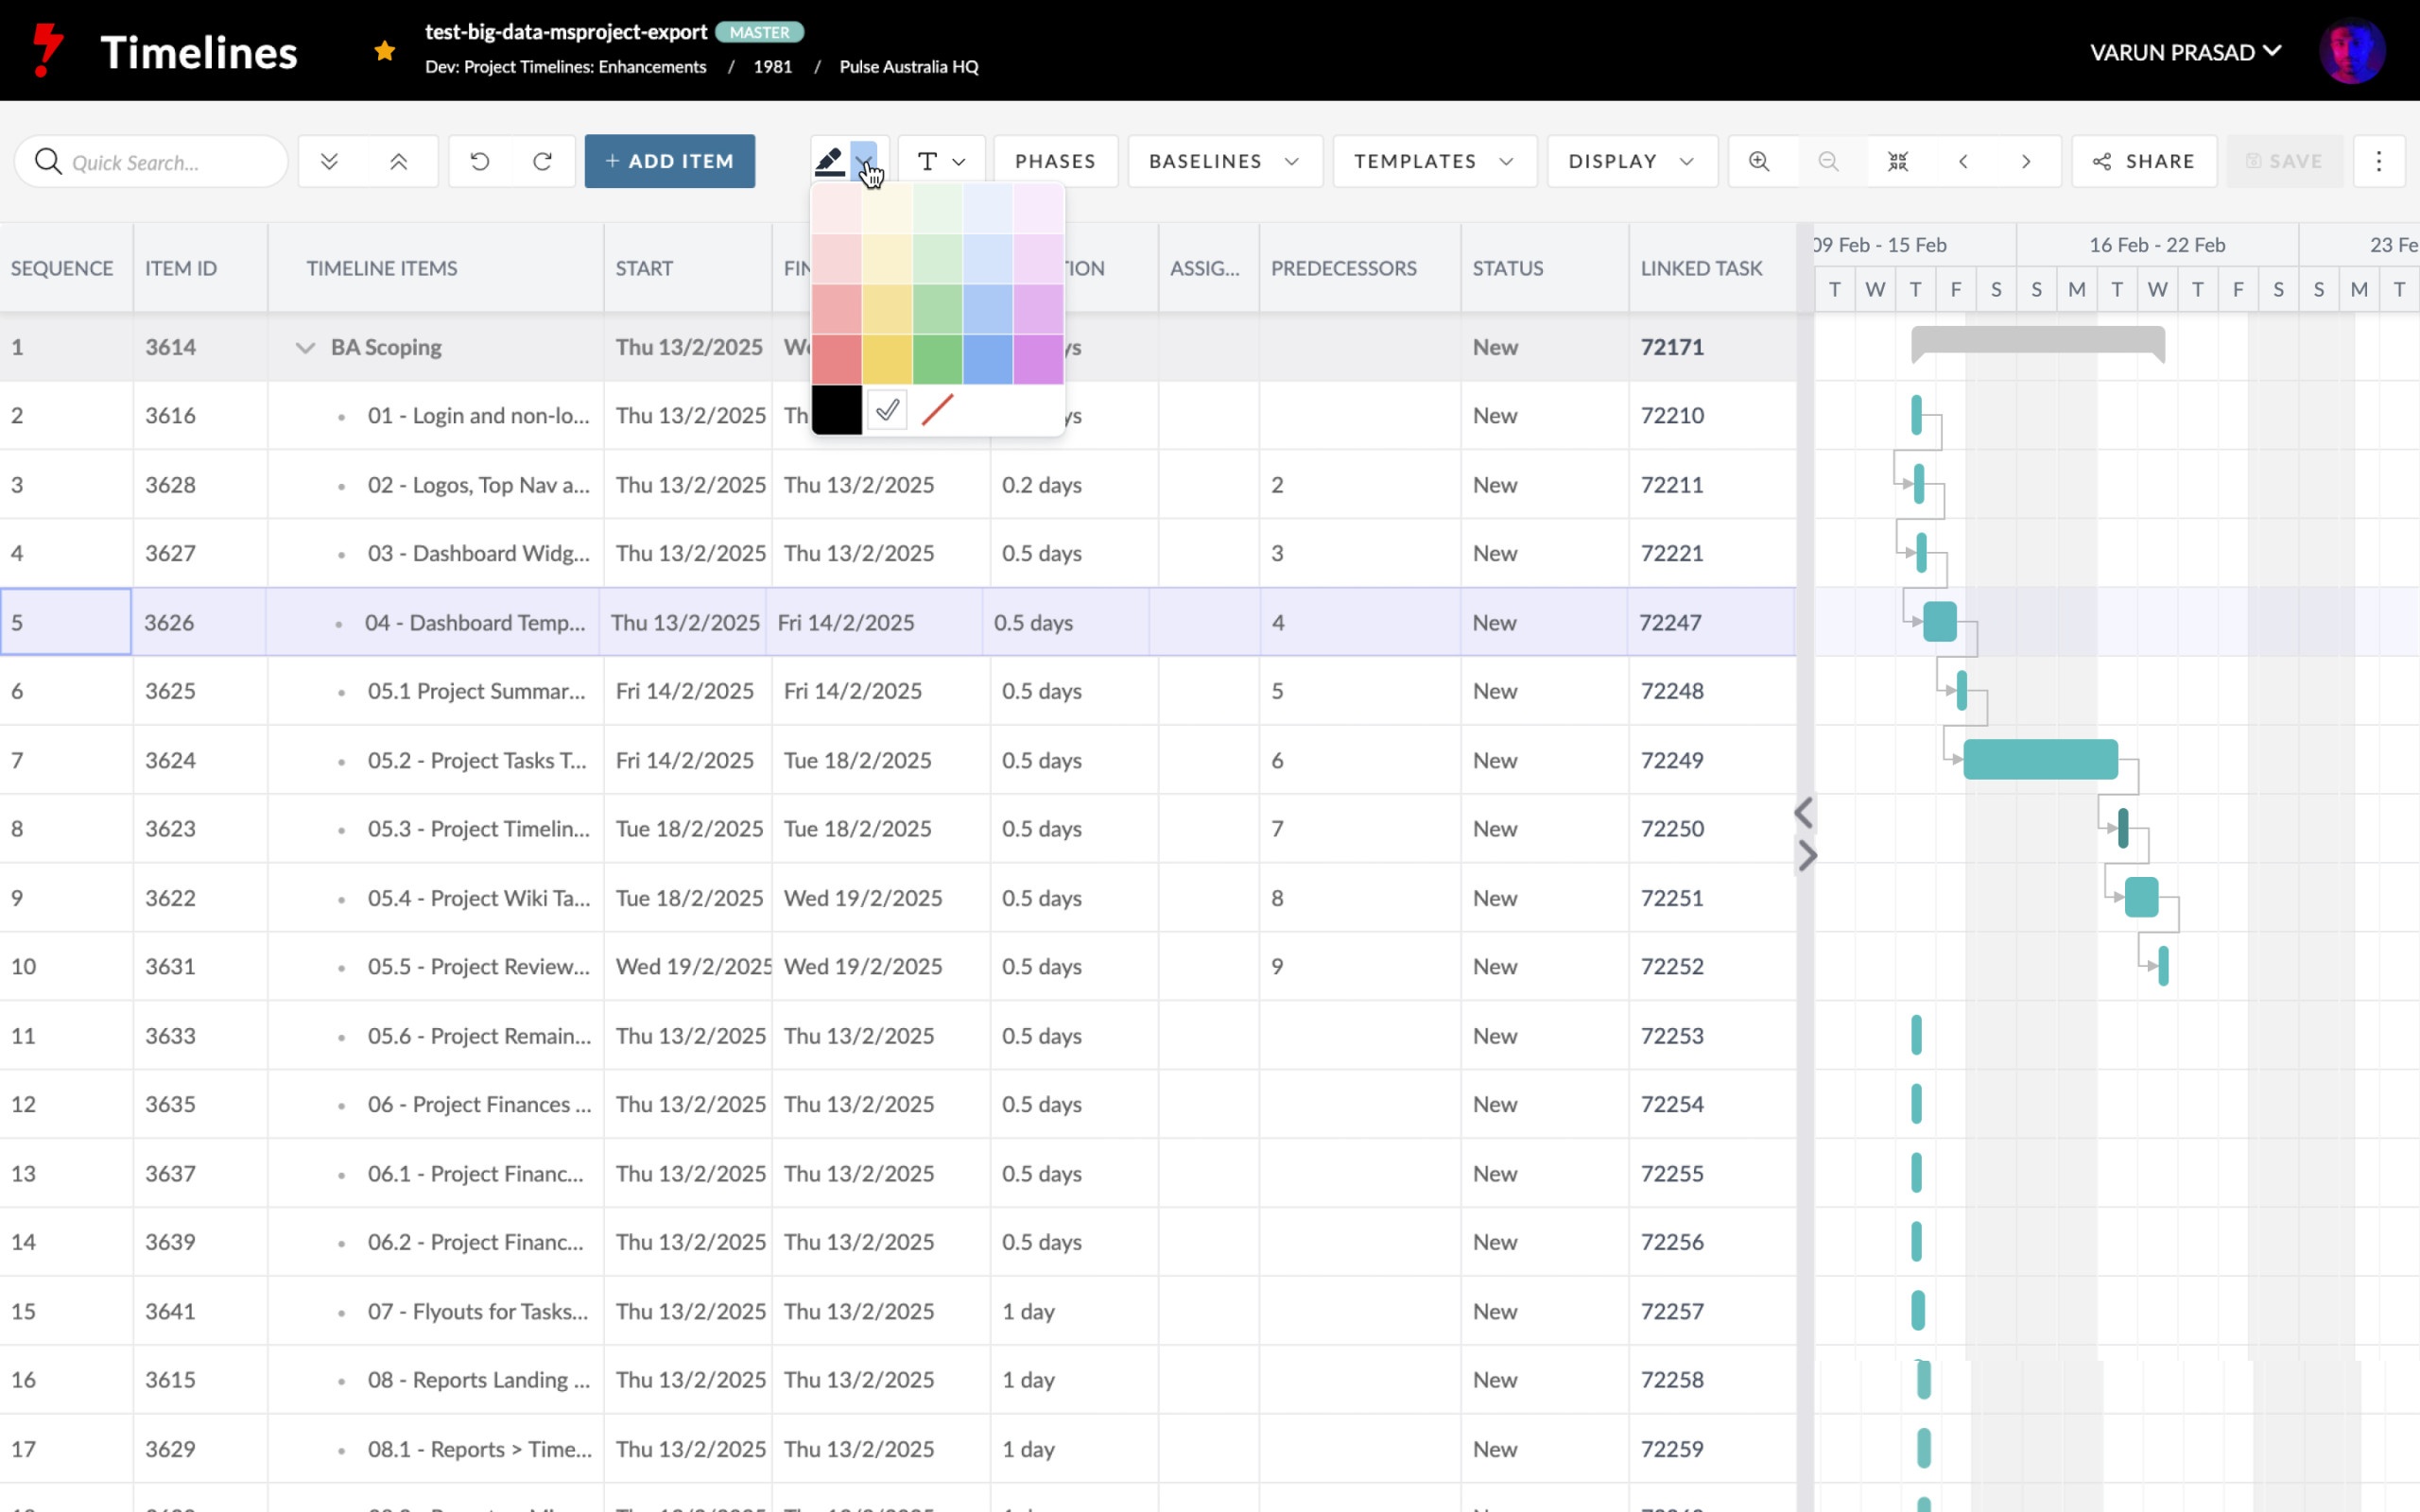
2. Colour Formatting (Paint Bucket Icon)

The paint bucket icon allows you to colour:
a. A Single Row
- Click anywhere in a row to select it.
- Click the paint bucket icon to open up the colour picker.
- Choose a colour — the row will update in both the Gantt table and the Gantt chart bar (with lighter opacity on the bar).
b. Multiple Rows
- Select the first row.
- Hold Shift and select additional rows.
- Choose a colour from the paint bucket drop down— all selected rows will update.
c. A Single Cell
- Click on a cell to select it.
- Use the paint bucket to apply a colour to just that cell.
d. Multiple Cells
- Click and drag to select multiple cells (highlighted in purple).
- Apply colour using the paint bucket tool.
3. Text Formatting (T Icon)
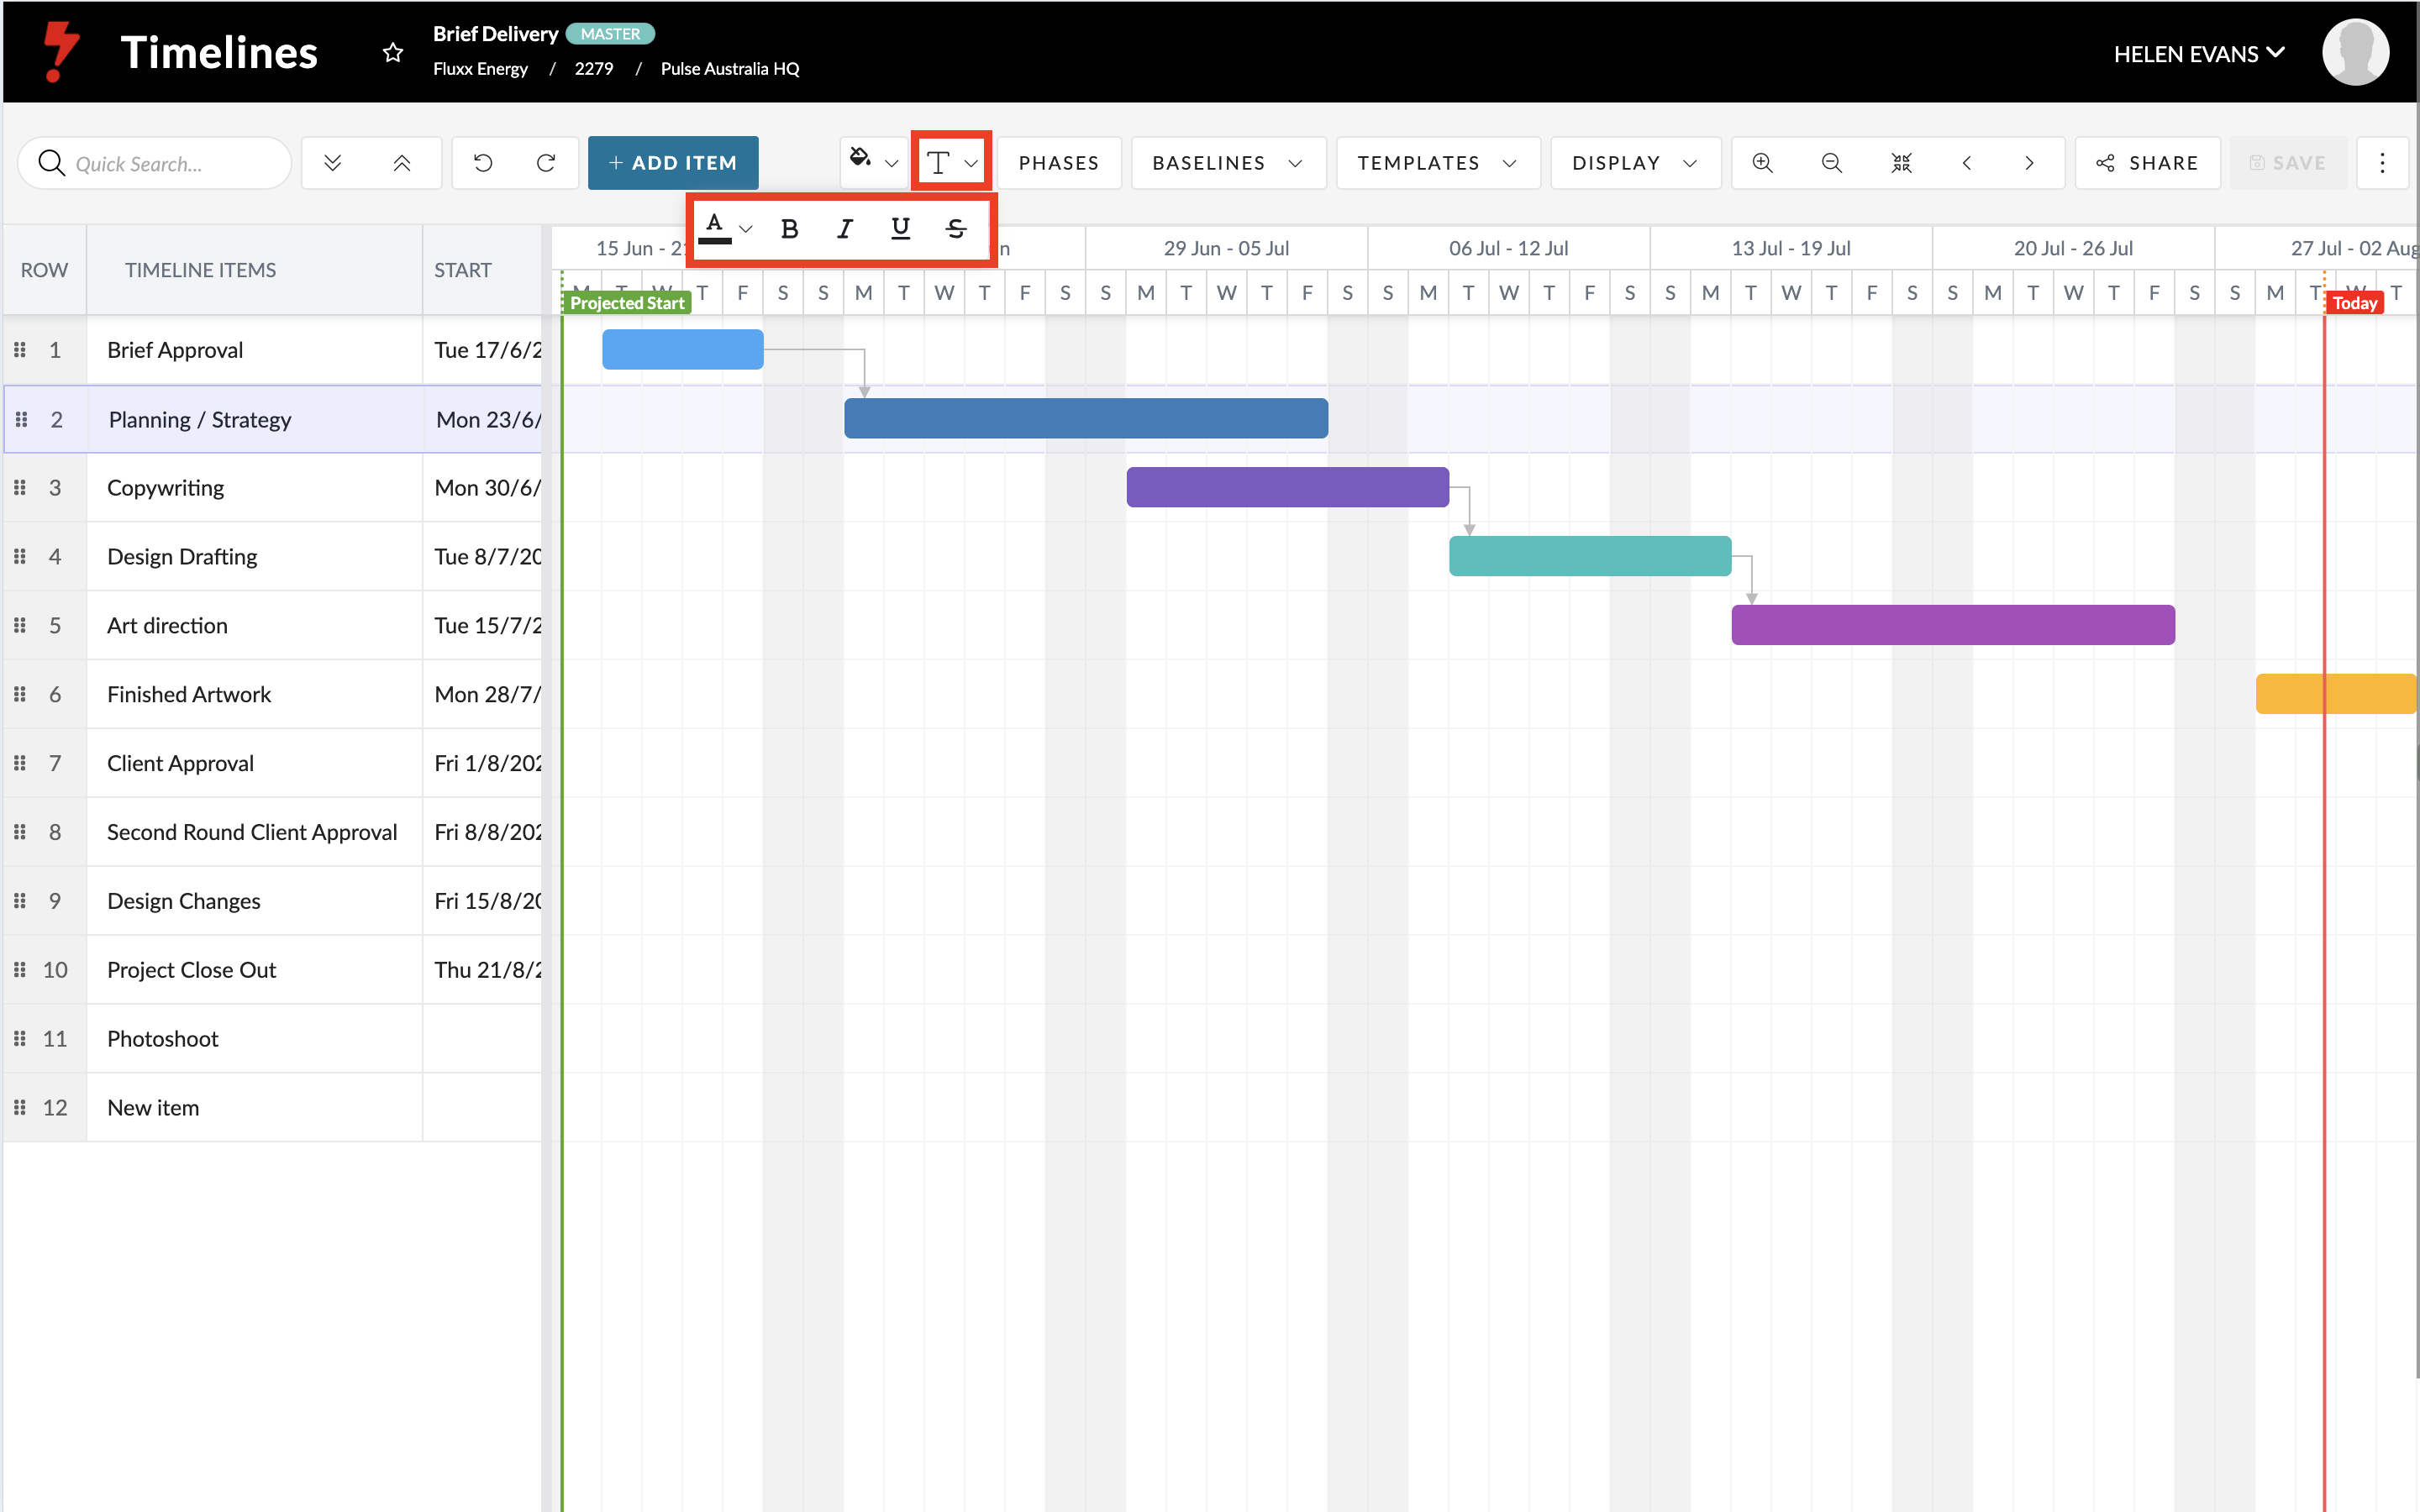
The T icon lets you format text with:
- Bold
- Italic
- Underline
- Strikethrough
- Text colour changes
a. A Single Row
- Select a row.
- Use the T icon to apply desired formatting.
- Selected styles will be highlighted in blue.
b. Multiple Rows
- Select a row, then hold Shift to select more.
- Apply formatting to all selected rows.
c. A Single Cell or Multiple Cells
- Click or drag to select cells
- Apply any combination of formatting options from the T icon.
- Click a formatting option again to remove it.
Tip: Strikethrough is a useful way to indicate completed items while keeping them visible.
Important Note: Gantt Bar Colouring
The colours applied through the paint bucket tool do not affect the Gantt bars directly. To learn how to format a Gantt bar colours visit XXX page
Summary
Formatting in the Timeline view makes your project easier to read and manage — especially when highlighting key tasks, deadlines, or completed items. Use row and cell formatting to bring clarity and focus to your project plans.