You can add Timeline Items in two easy ways:
1) Add item button
- Click the add item button in the top-left of the Timeline
- Then click and drag on the Timeline to set the start and end dates for your item
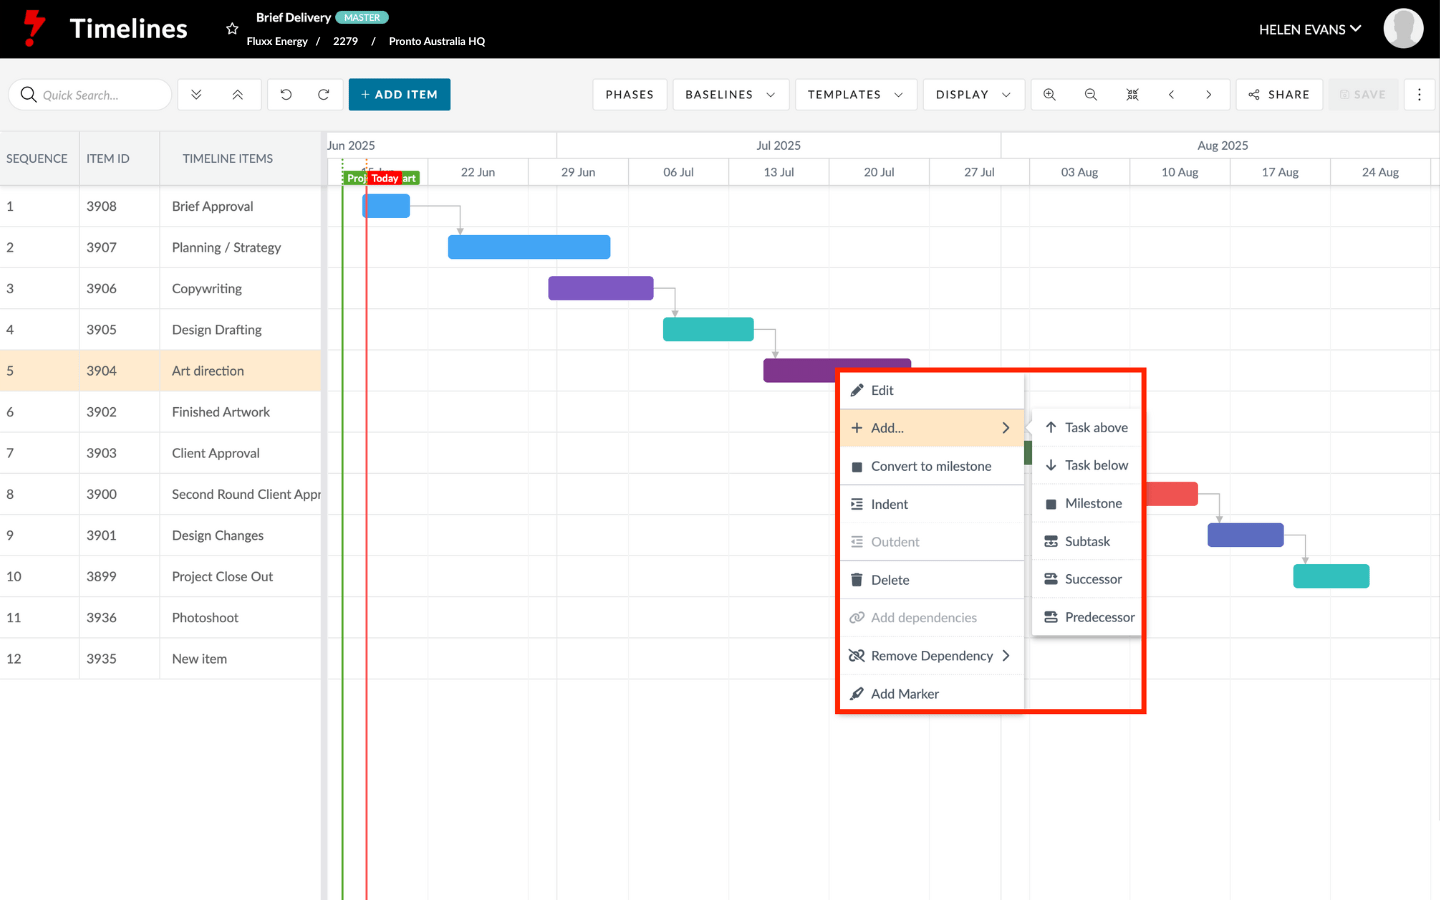
2) Right-click menu
Right-click on an existing item to access these options:
- Edit – Update the item details
- Split Task – Divide the item into two parts
- Indent – Shift the item to create a sub-level
- Delete – Remove the item
- Add marker – Place a visual marker on the timeline
You can also create new items relative to the one you right-clicked:
- Task above – Adds a new item directly above
- Task below – Adds a new item directly below
- Milestone – Adds a milestone item below
- Subtask – Turns the item into a parent, and adds a child item underneath
- Successor – Adds a linked item after the current one
- Predecessor – Adds a linked item before the current one