The Timelines Grid View lets you manage your Timelines without opening each one individually.
Using the Timelines Grid.
This is where all your Timelines live. The grid includes 8 columns:
- Timeline Name
- Type
- Author
- Start Date of the first Timeline Item
- End Date of the last Timeline Item
- Item Count
- Last Modified date
- View & Control options
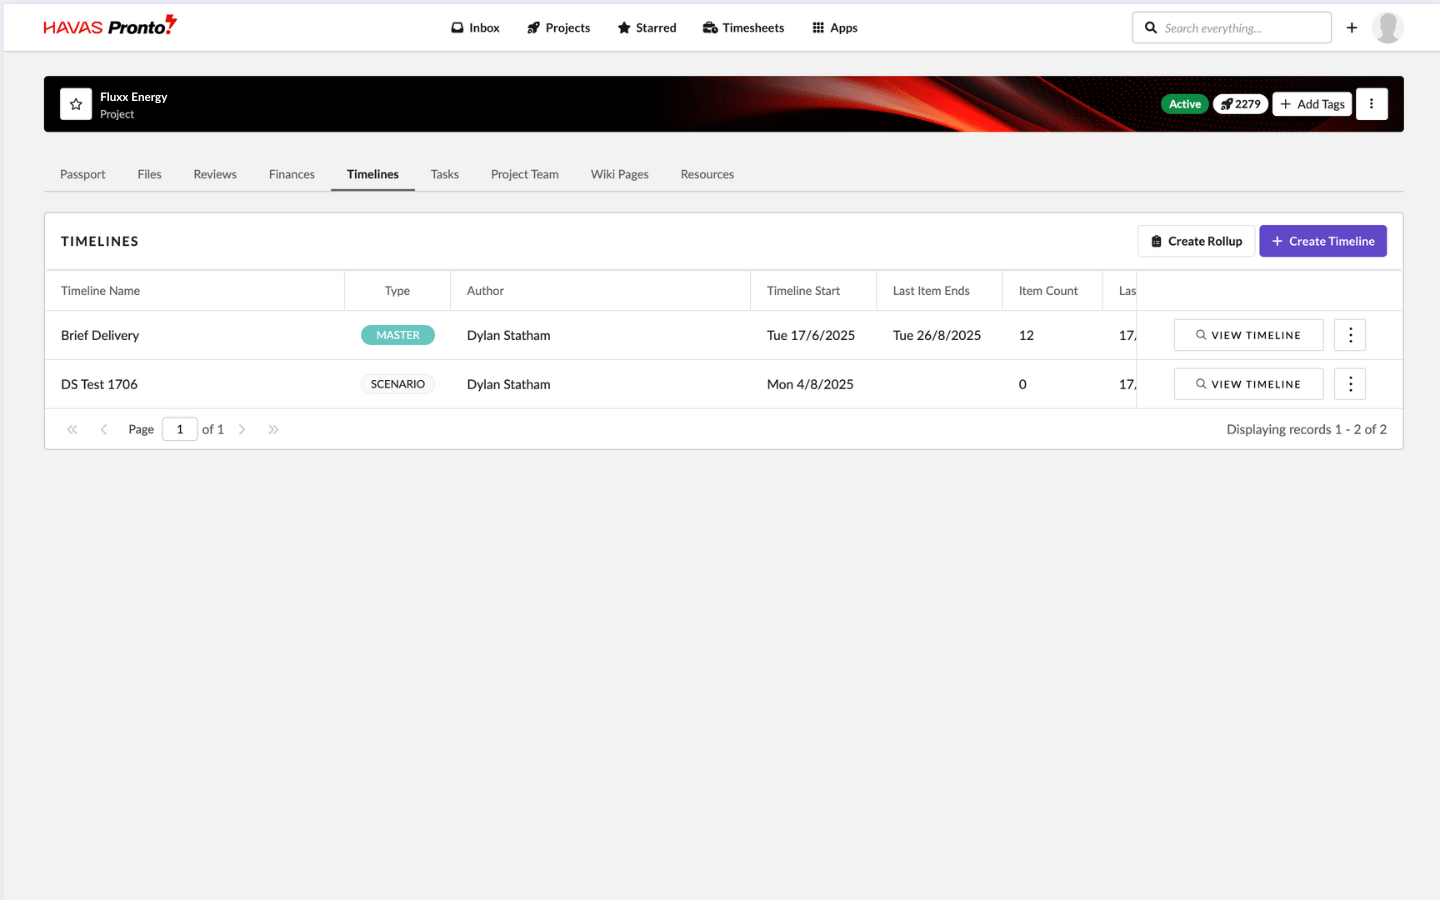
To reorder or prioritise columns, just hover over a column heading, click, and drag it to your preferred spot.
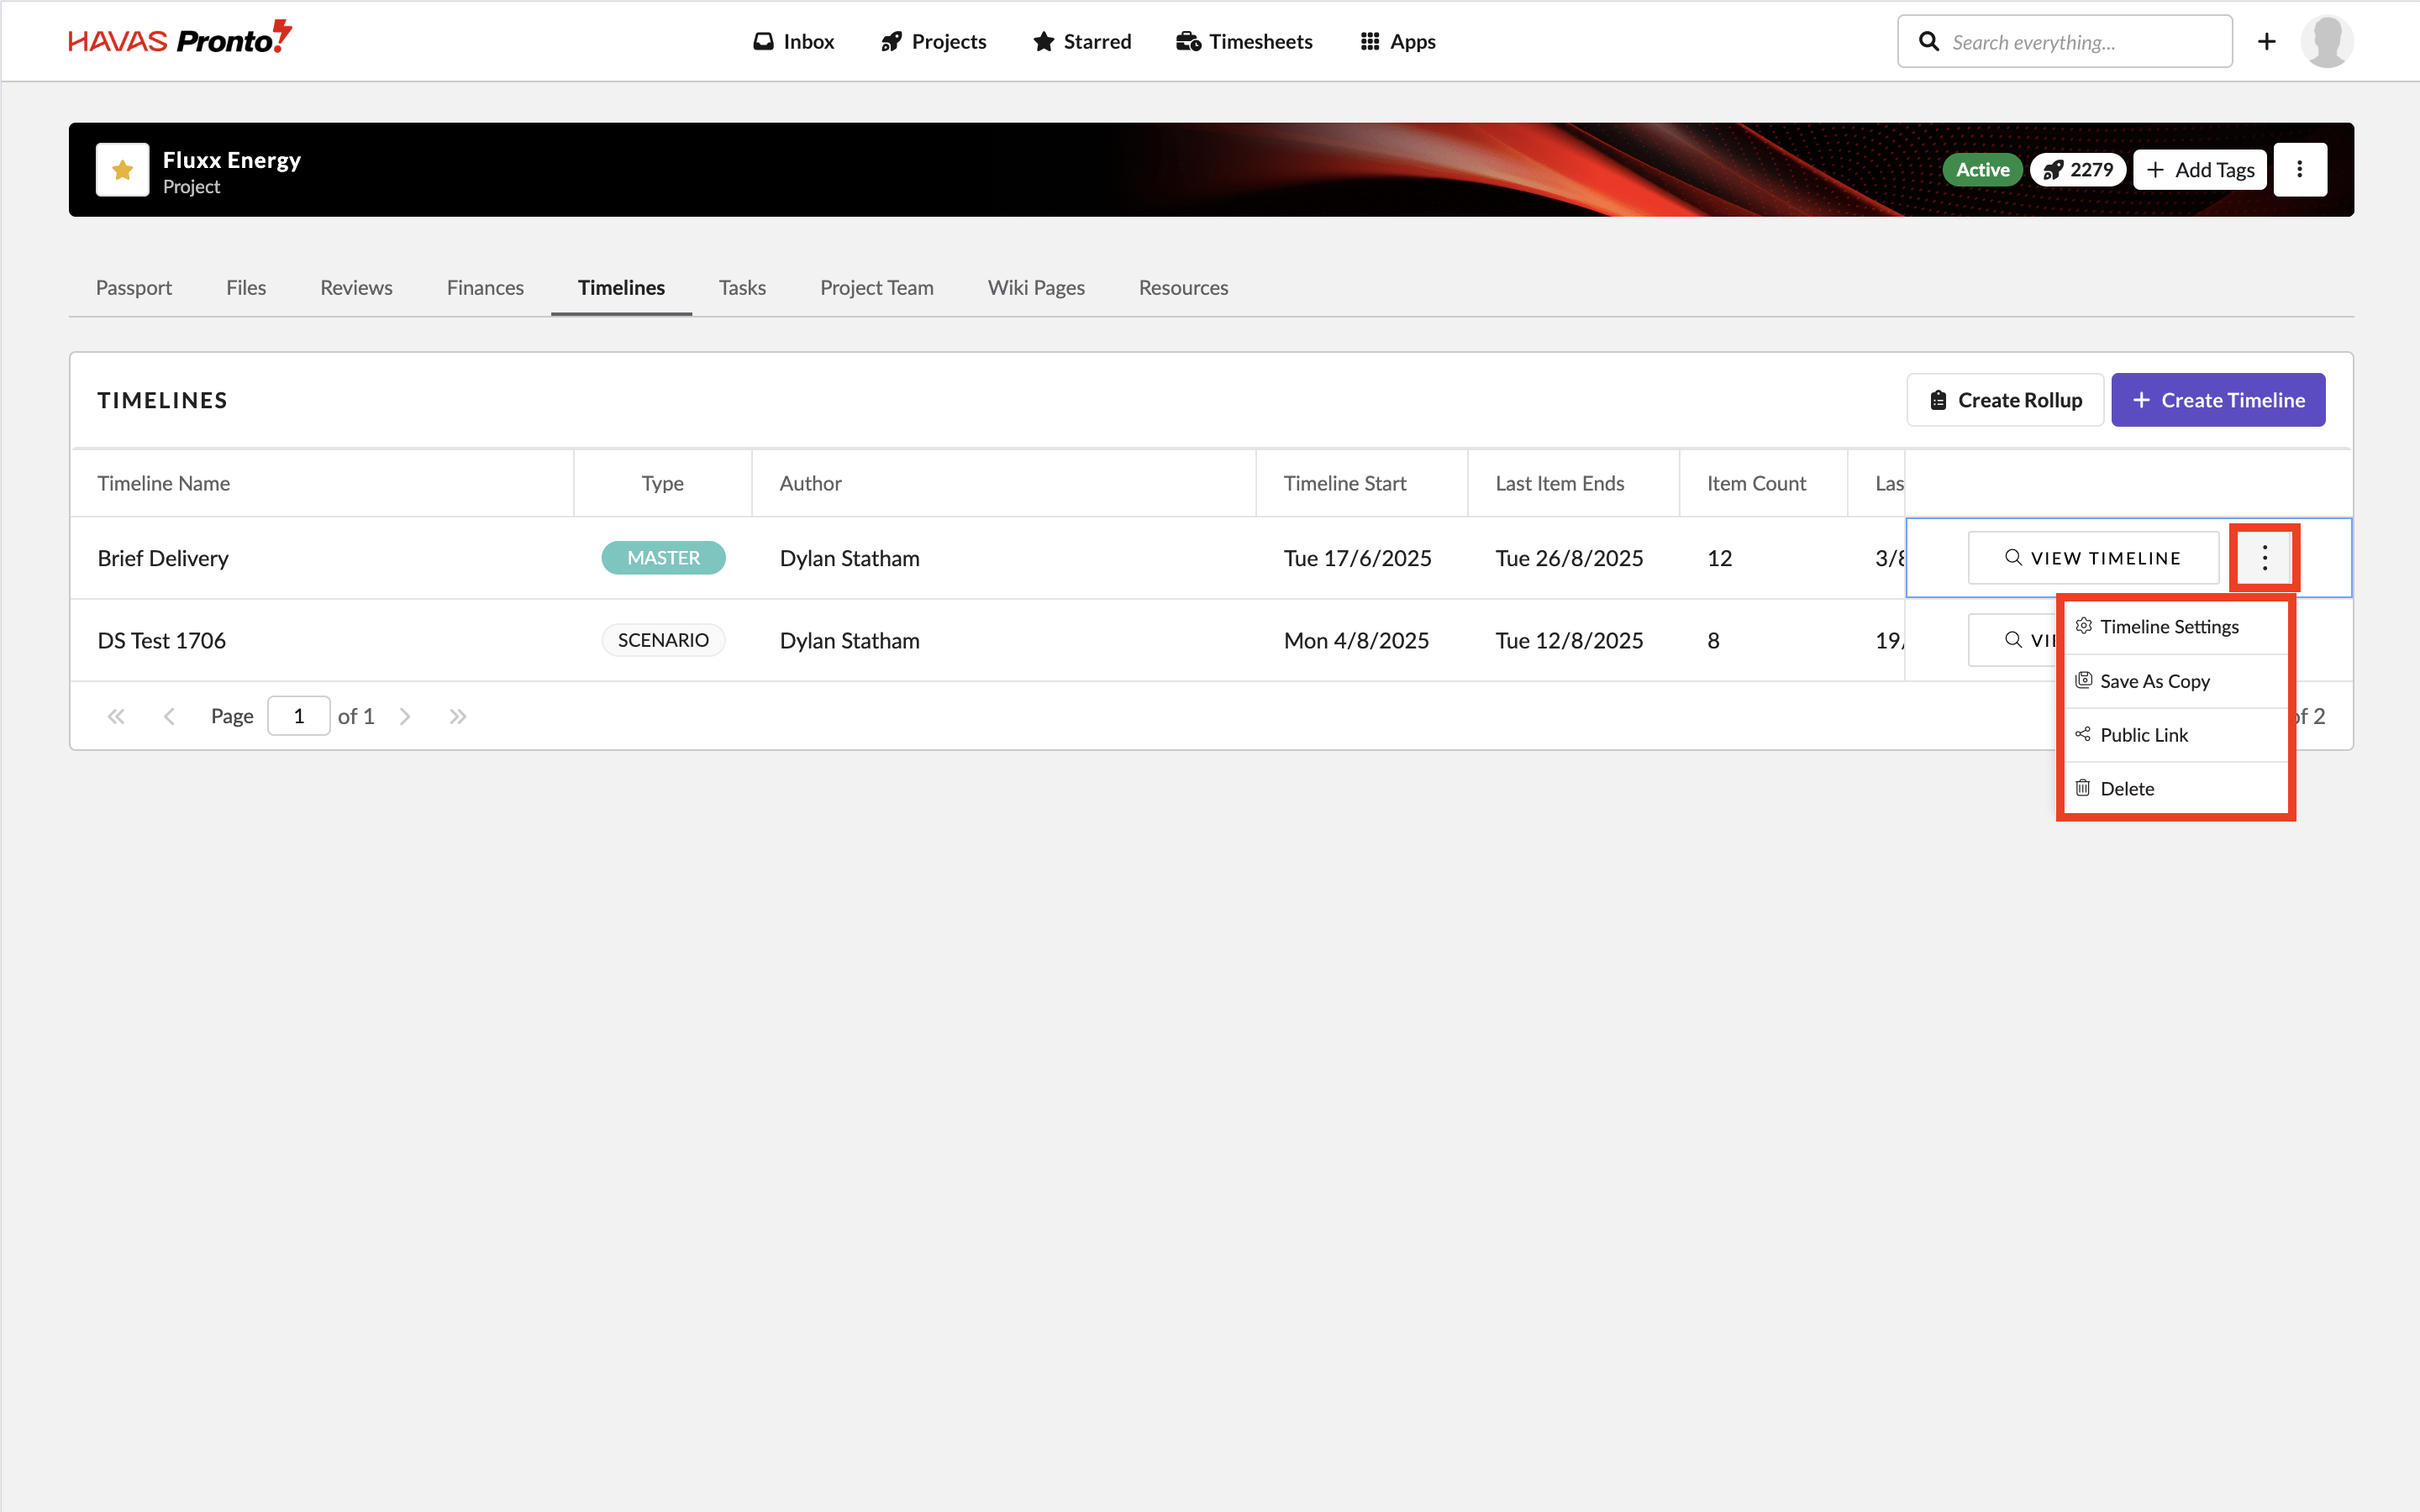
Editing a Timeline from the Grid
To edit a Timeline, go to the Timeline Grid and click the ellipsis button on the far right of the row.
This will open a pop-up where you can:
- Adjust Timeline Settings
- Save a copy of the Timeline
- Create a public link
- Delete a timeline
(For more information on editing a timeline see section 4)
Master & Scenario Timelines
There are three types of Timelines you can create:
- Master – The main, official Timeline. This is the first one you create.
- Scenario – A sandbox version that lets you test changes without affecting the Master.
- Roll-Up – A combined view showing multiple Timelines (Master, Scenario, or both) side by side for easy comparison.
By default, any new Timeline created after the original is a Scenario. A Scenario can be “promoted” to Master from within the Gantt view.
- To promote a Scenario to become the new Master:
- Click the ellipsis (⋯) in the top-right navigation
- Select Promote to Master
For on Master & Scenario Timelines more see section 4.1
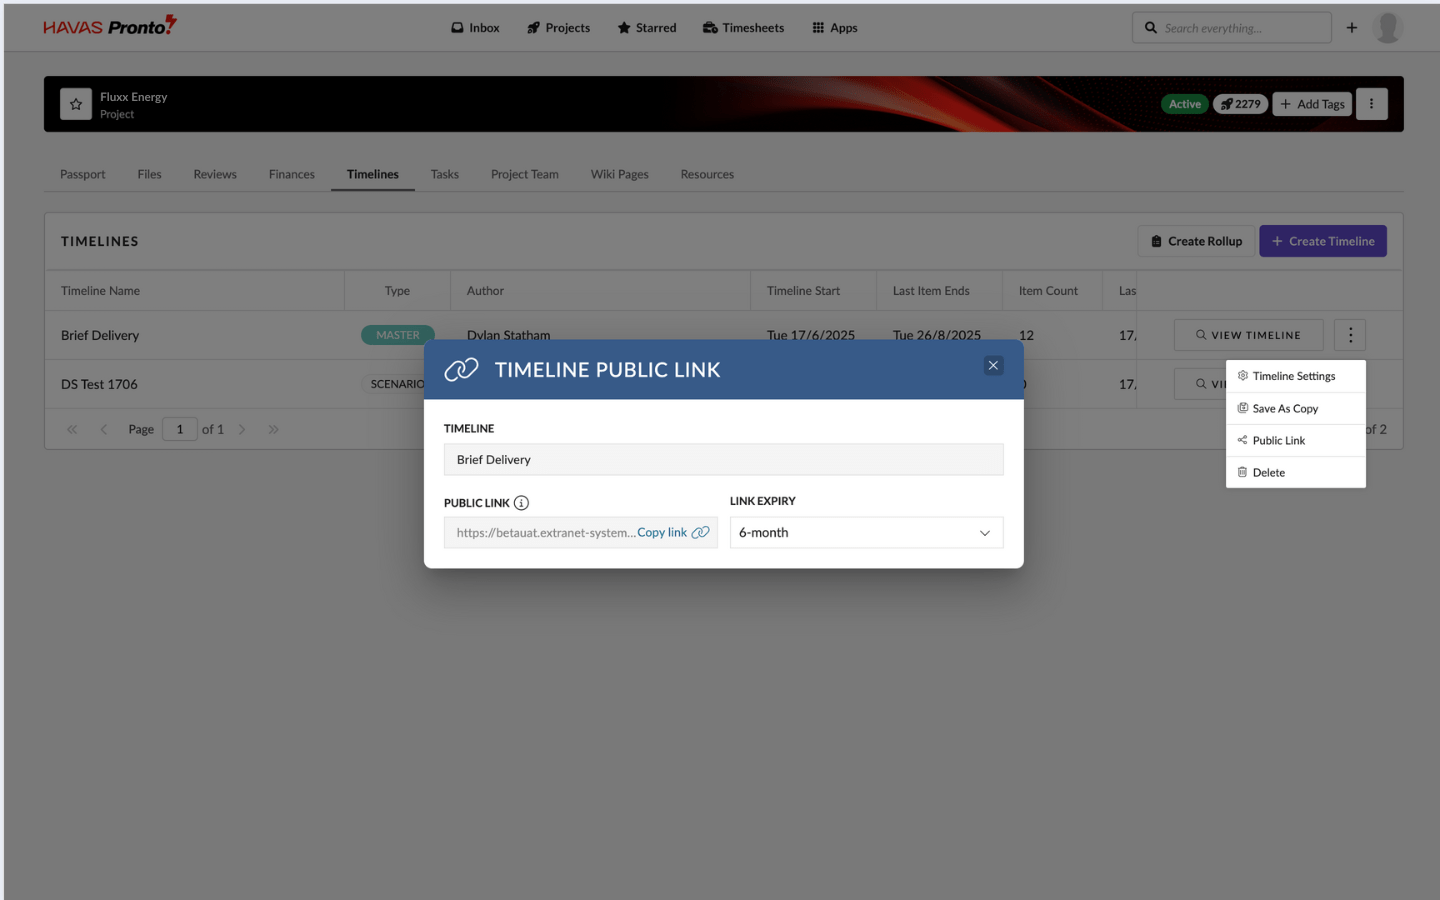
Creating a public link
To share a Timeline via public link:
- In the Timeline Grid, click the ellipsis button (⋯) on the far right of the Timeline row
- Select public link from the dropdown
- A pop-up will appear with:
- A copyable link to share
- An expiry dropdown to set how long the link stays active
Use this to easily share your Timeline with people outside Pronto.

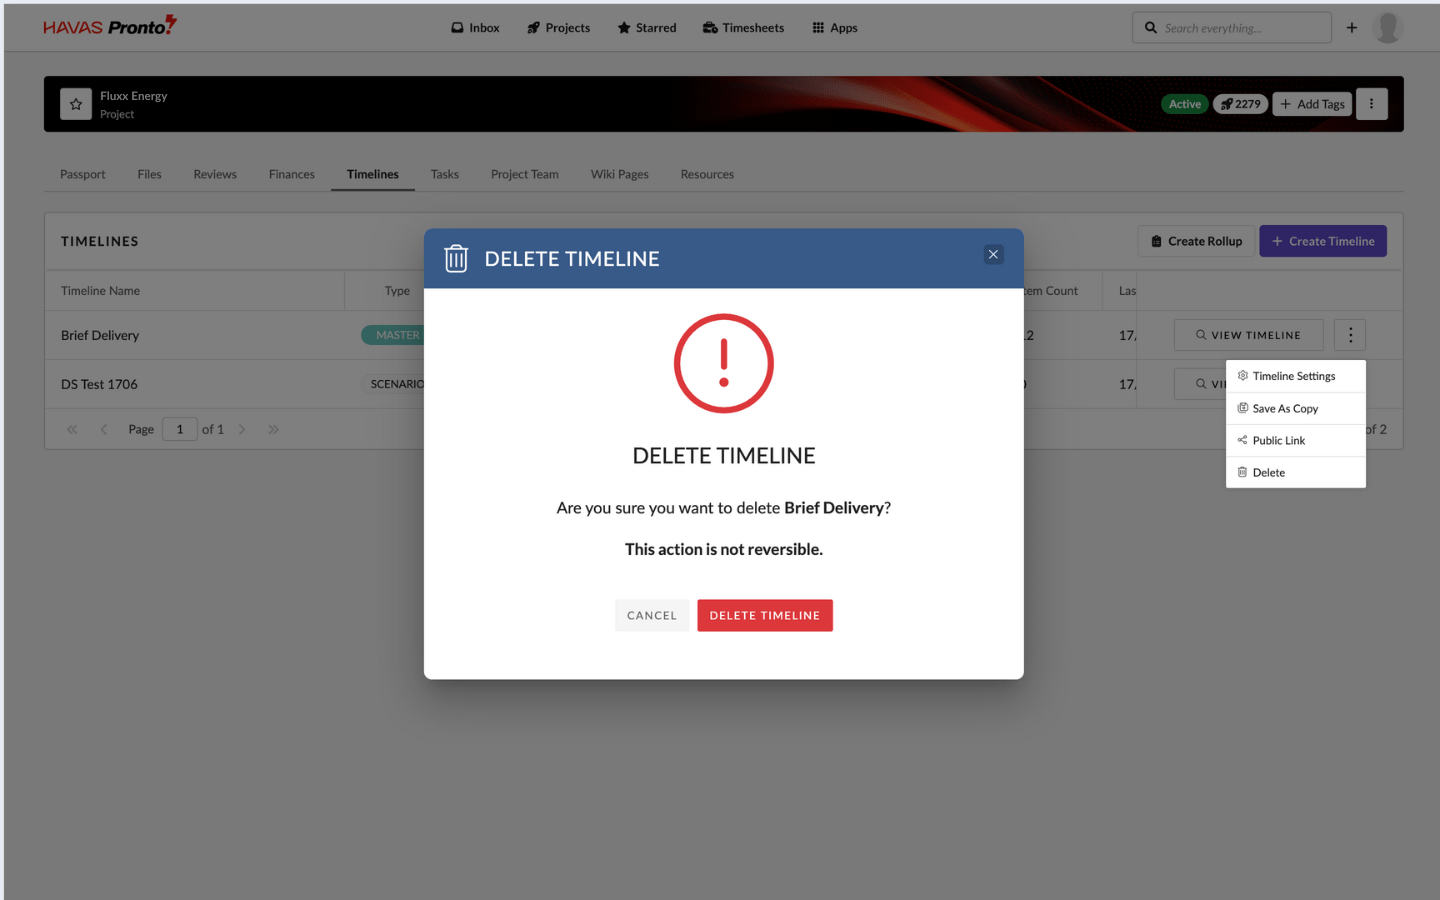
Deleting a Timeline
To delete a Timeline:
- In the Timeline Grid, click the ellipsis button (⋯) on the far right of the Timeline row
- Select Delete Timeline from the dropdown
- A confirmation pop-up will appear — click Delete Timeline to confirm
Deleted Timelines can’t be recovered, so double-check before you remove one.

Viewing a Timeline
This will launch the selected Timeline in a new tab, where you can view and make any needed changes.
