The Project Wizard is a multi-step form that guides you through creating a Project with the right workflow, settings, and team.
For most users, no training is needed — just follow the steps.
As you move through the Wizard, each step will adapt based on the info you provide — ensuring the setup fits your chosen workflow and project type.
It’s dynamic, intuitive, and built to help you get started fast.
Project Wizard Steps
However, if you would like to learn more about what happens in each step, review the ‘Steps Overview‘ below.
| Step | Screengrab | Title | Description |
|---|---|---|---|
| 1 | 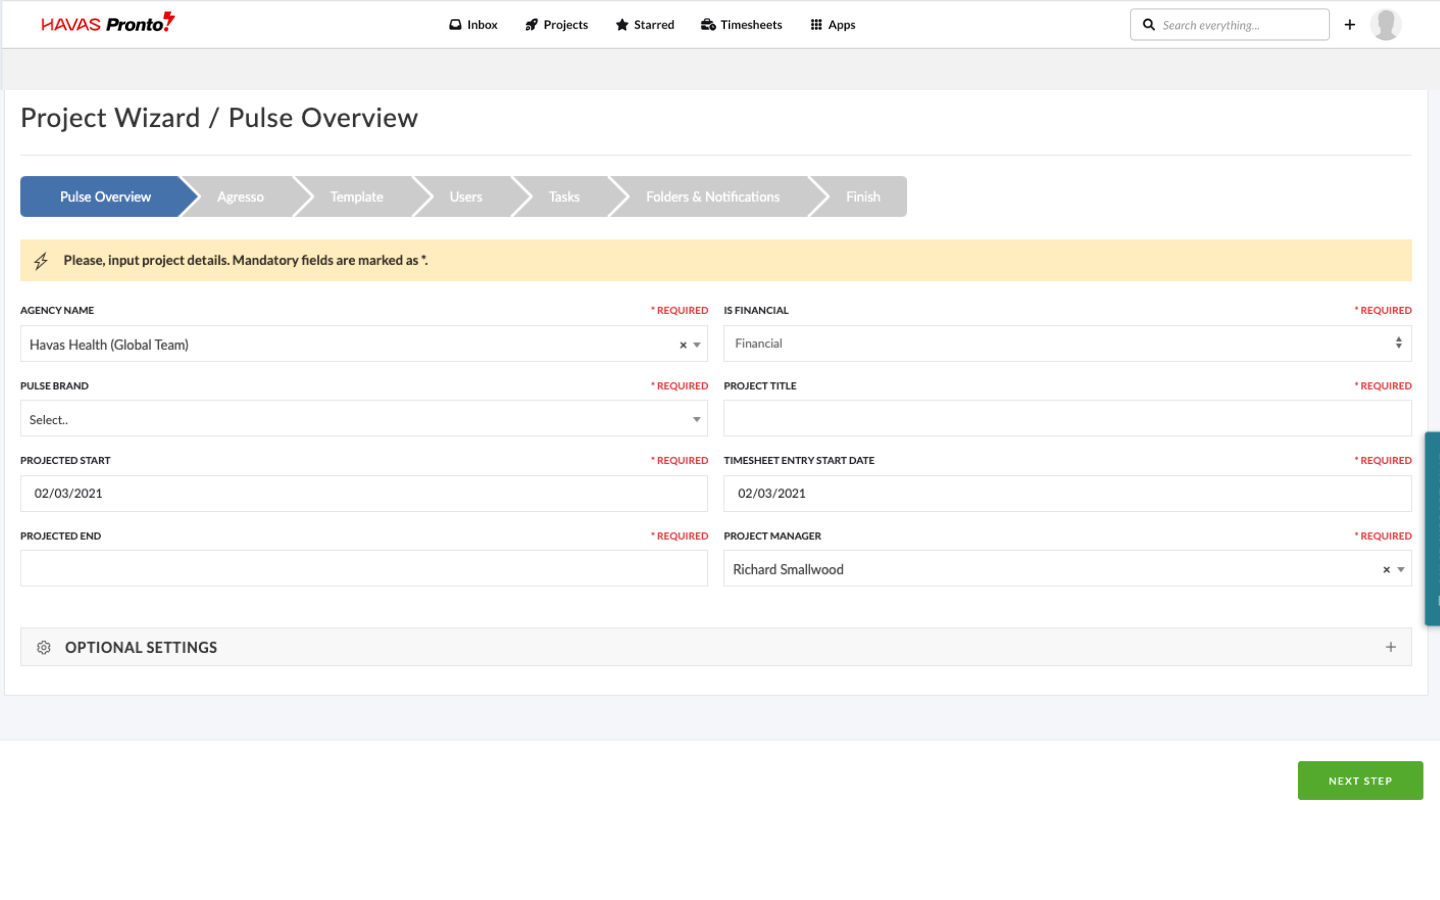 | Basic Project Details | Enter the basic information for the Project, including: – Project Title – Project Manager – Office Location to complete the work. – Assign the Project to a Brand – Forecast Start Date – Forecast End Date – Project ‘Type’ |
| 2 | 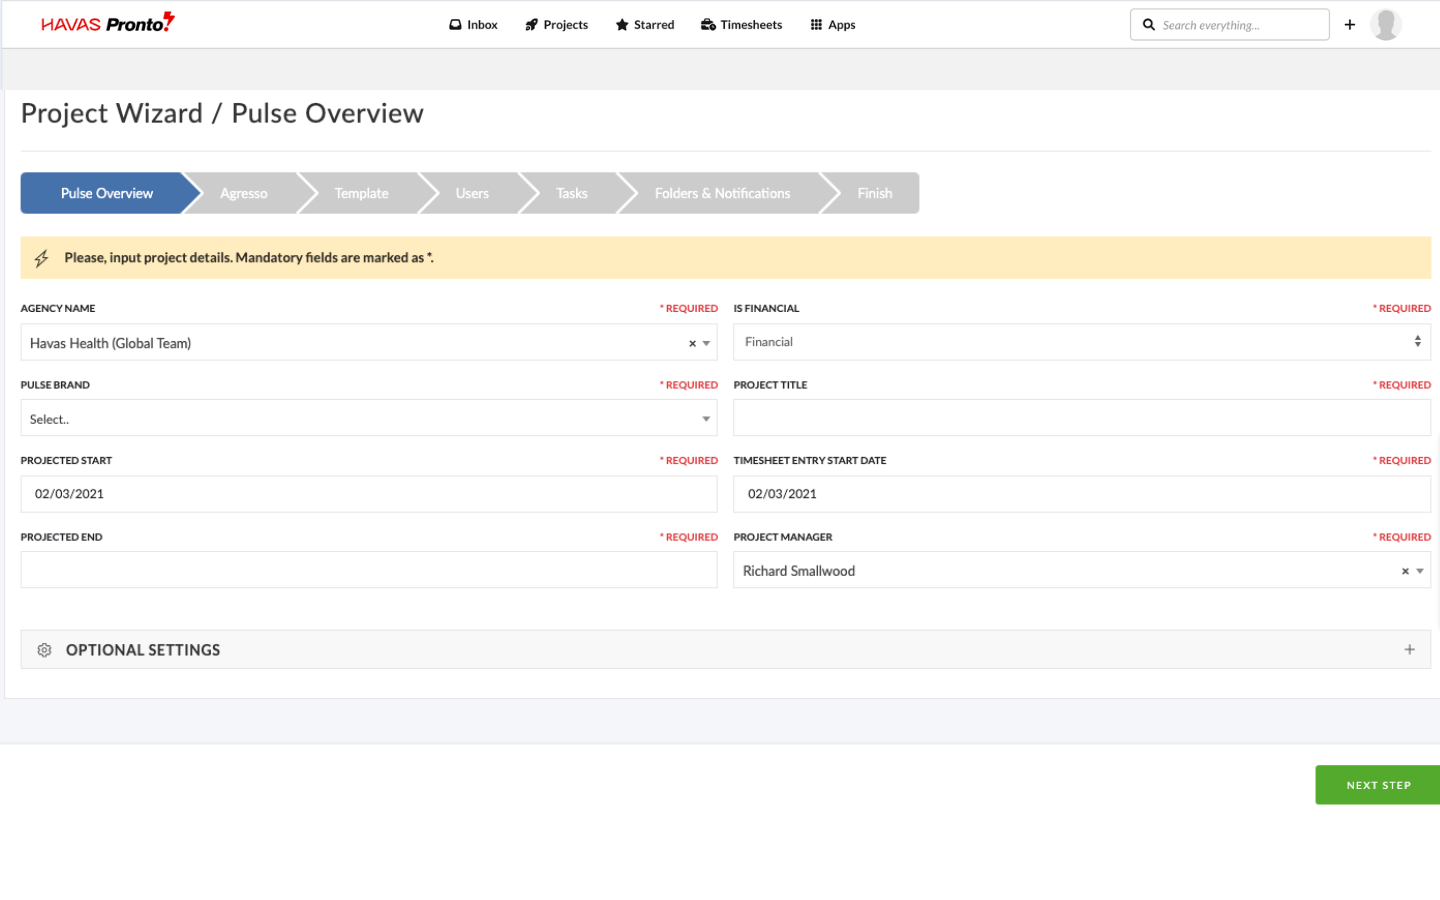 | Finance Step: Agresso Configuration | If the selected Office for the Project (Step 1) is linked to an Agresso profile, Step 2 will automatically display additional finance-related fields. The number of fields shown depends on how the Office is configured — some setups will show just a few fields, others may include more. If your Office has default options set for Agresso, many of these fields will pre-fill automatically to save time. Want to configure Agresso defaults for an Office? Head to the Advanced Settings section in the Address Book training module. |
| 3 | 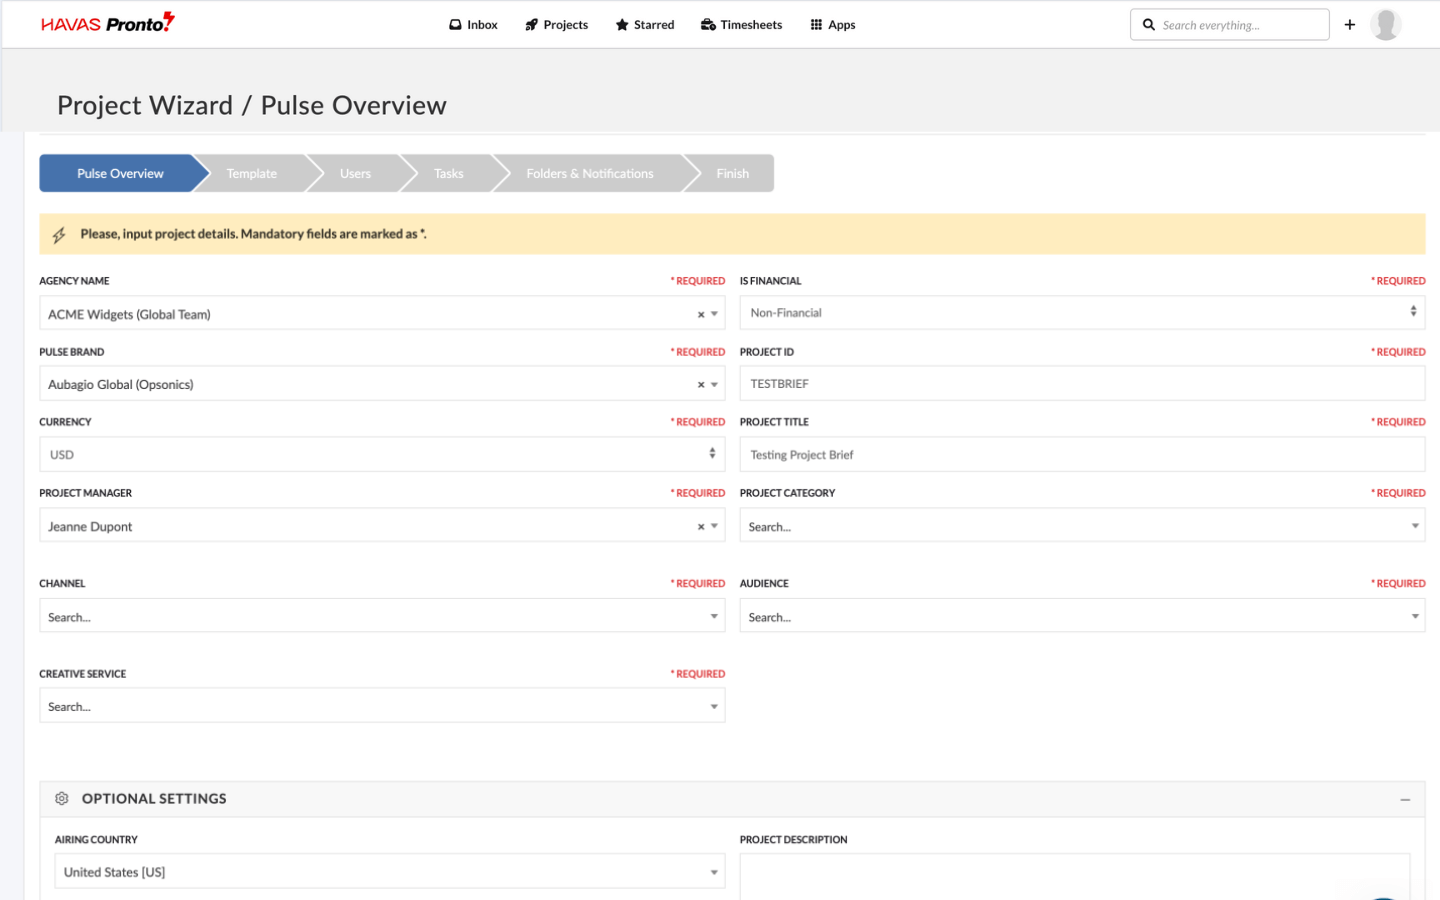 | Choose a Project Template | The Project Template step usually appears as Step 2 — unless you’re creating a Project in an Agresso-linked Office, in which case it becomes Step 3. Here, you can select a ready-made Project Template to fast-track setup. Templates can include pre-configured Tasks, Folders, Files, and Team Members, tailored to suit specific workflows or project types. For example, you might use a Standard Template for everyday work, or a Photoshoot Template with all the key steps, structure, and roles ready to go. Some Offices and Brands may already have a Default Template selected to keep things consistent. |
| 4 | 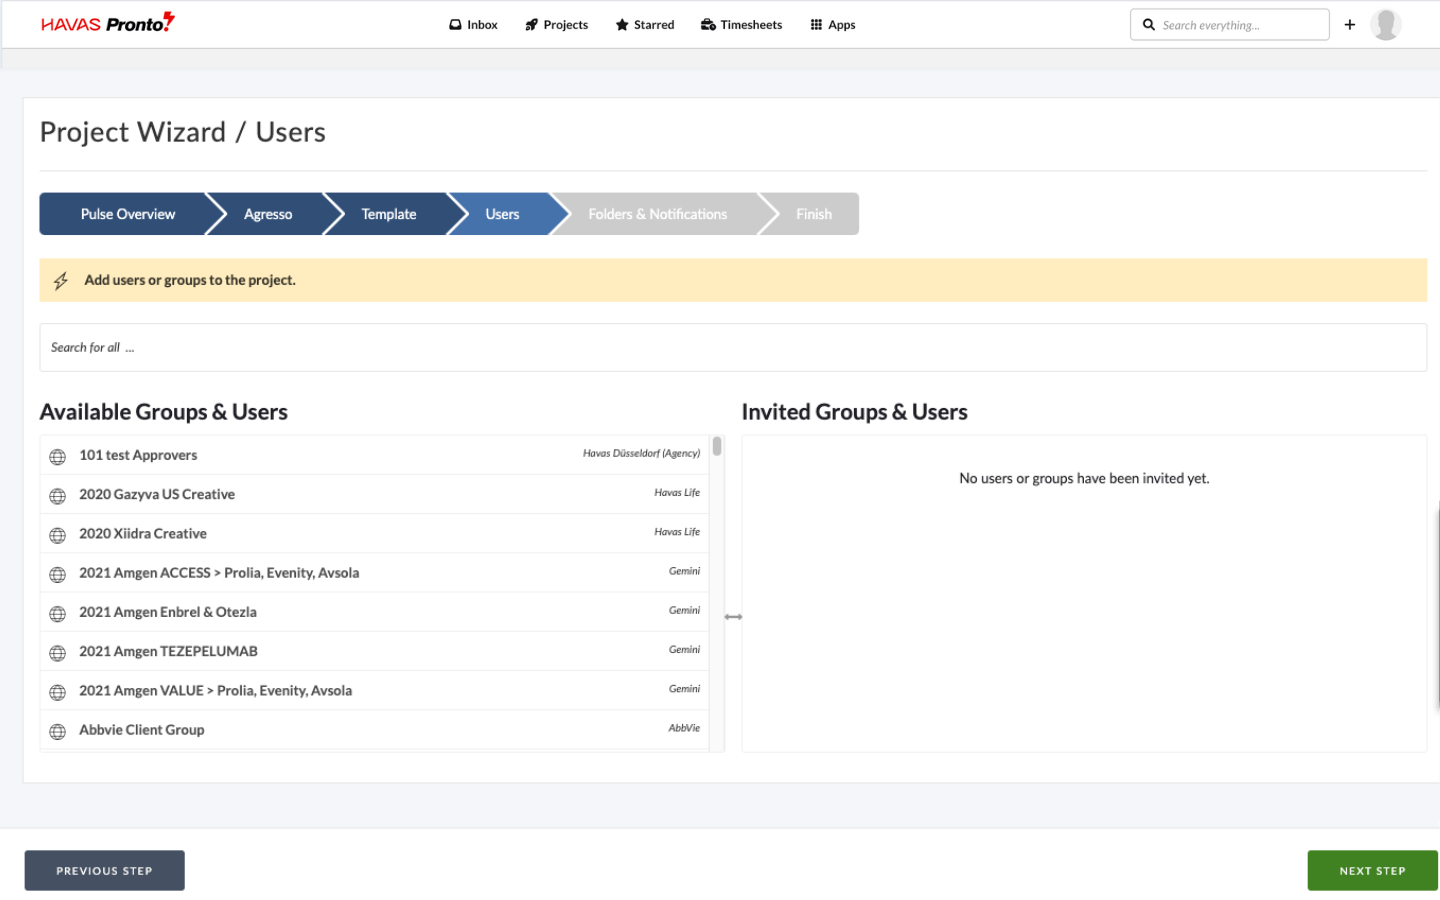 | Add Your Project Team | In this step, you’ll invite Users and Groups to the Project Team. Anyone on the Project Team will have access to the Project — no matter their personal access level or which Office they’re from. Team Members invited here will also be able to log Timesheets for this Project. Note: A few additional settings control when a Project is open for timesheet entry. For more detail, check out the Timesheet Administration training module. |
| 5 | 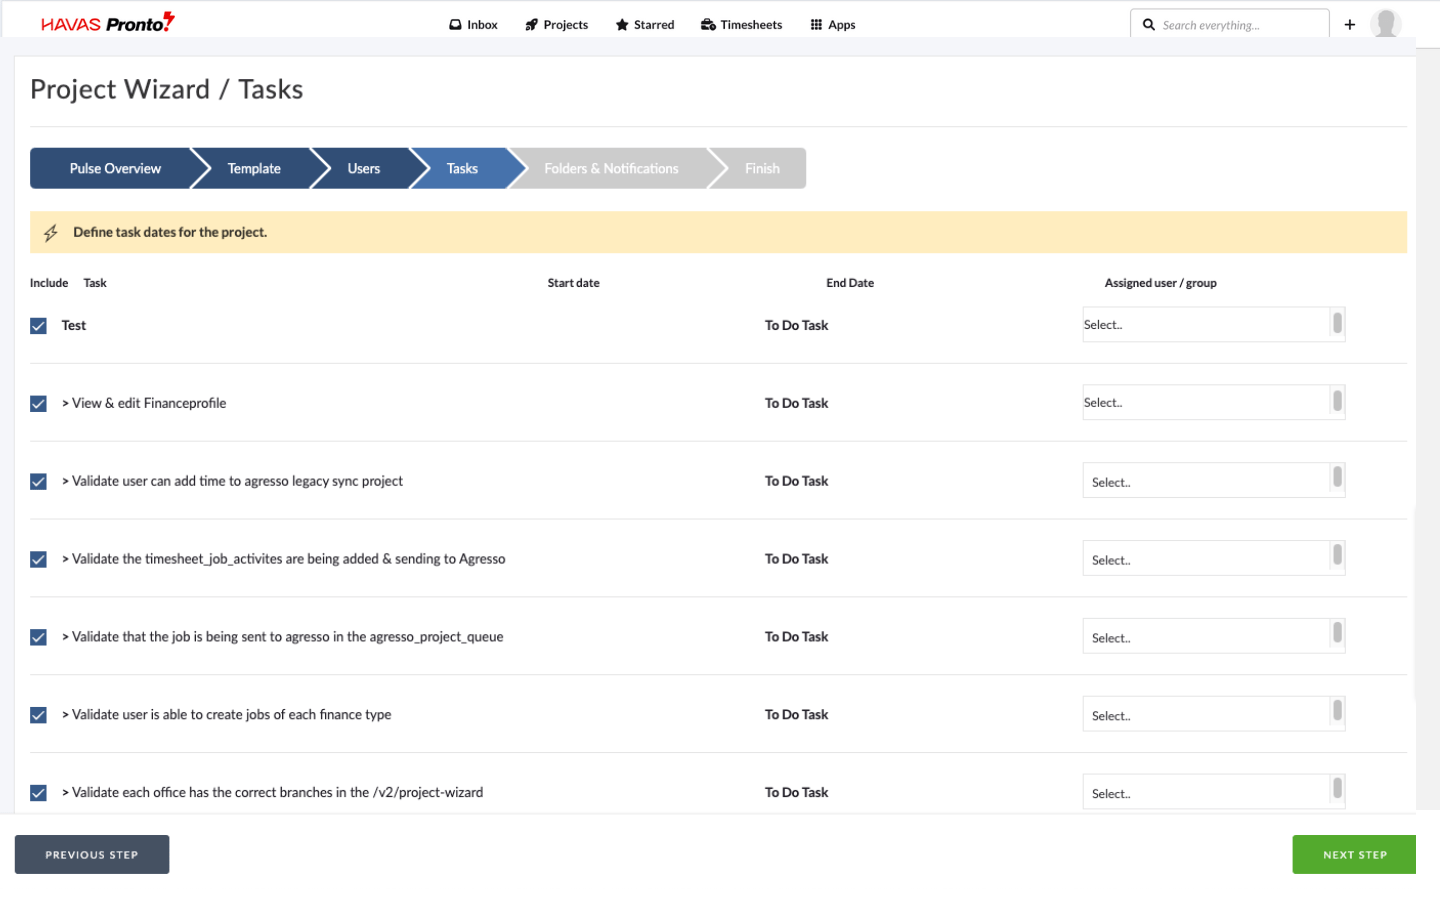 | Review Template Tasks | If your selected Project Template includes Tasks, you’ll see them in this step. You can: -Review and adjust timings -Update assigned users -Remove any Tasks you don’t need In some cases, an Office or Brand may enforce a specific Task list — if so, this step might be skipped. |
| 6 | 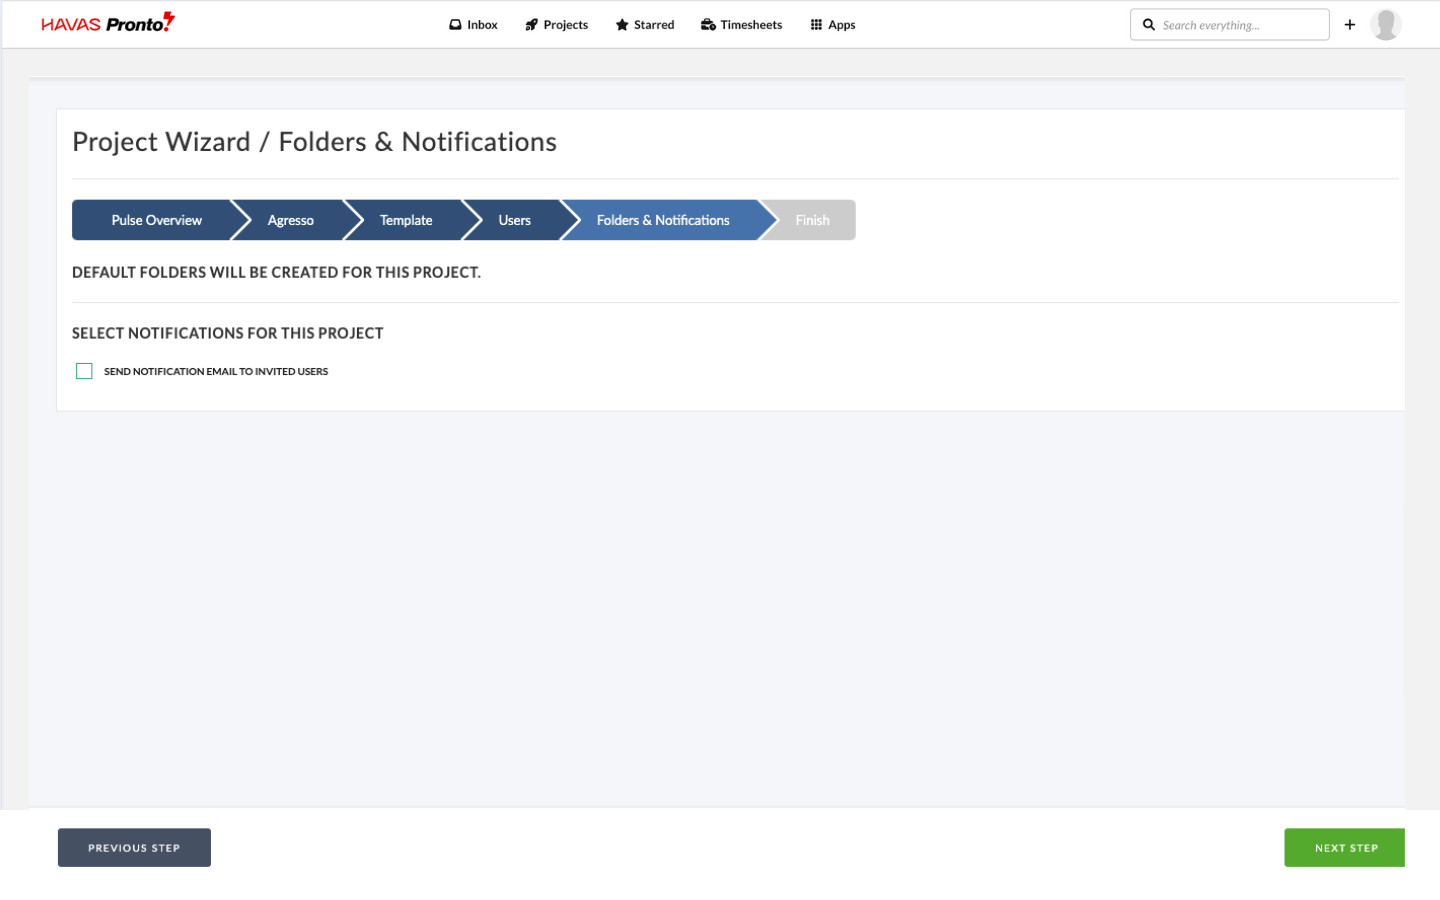 | Notifications & Folder Options | Before you create the Project, you’ll choose how it’s set up: 1. Send notification email to the invited Project Team? 2. Create folders based on the Project Template? Both are set to Yes by default — but you can switch them off if needed. |
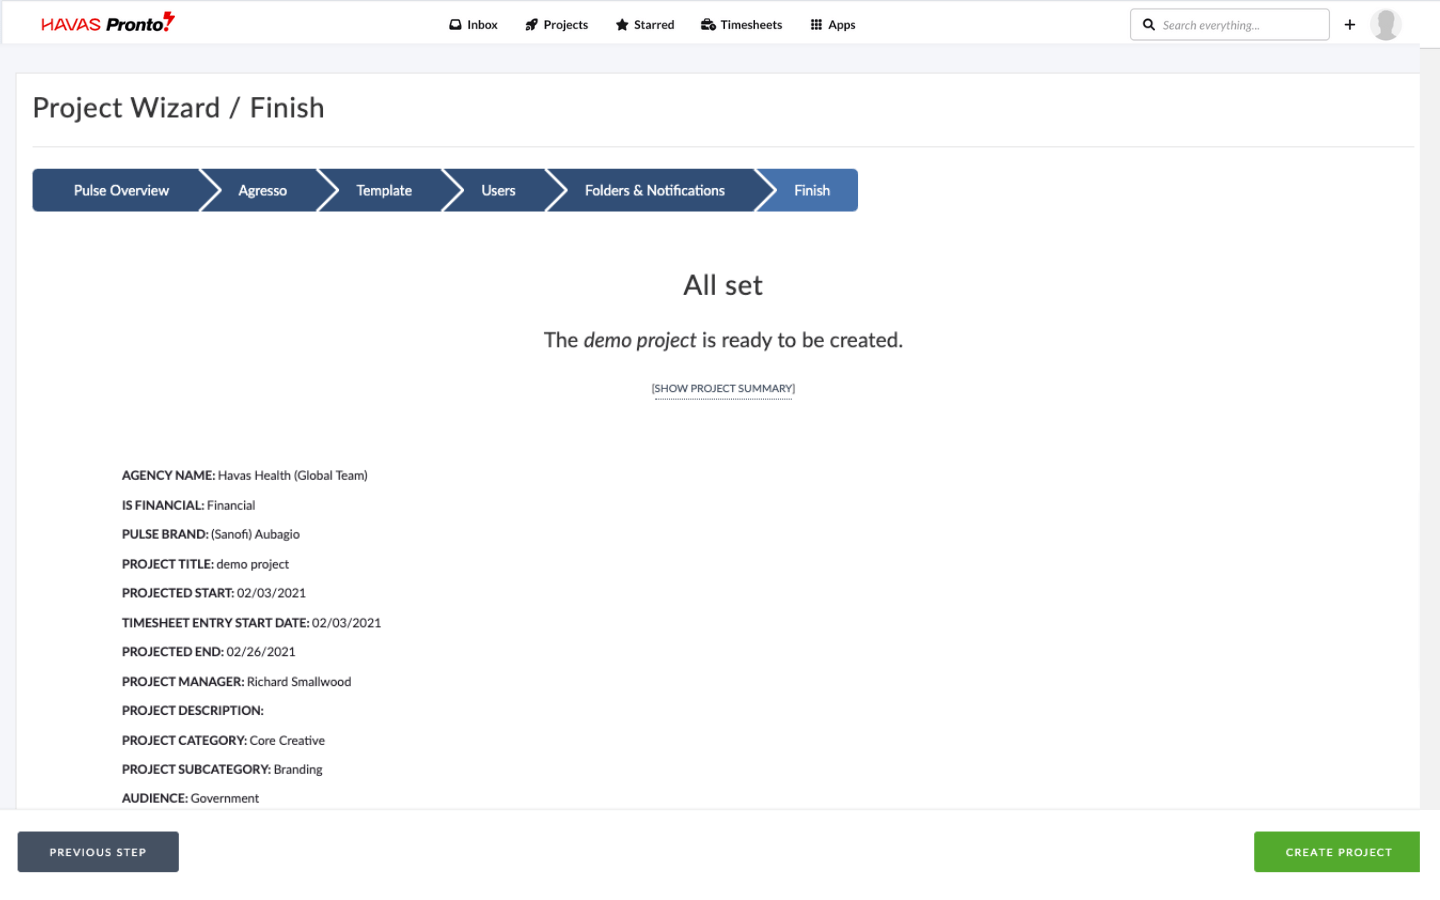 | Review Project Details | At the final step, you’ll see a summary of your selections. Click to expand the view if you’d like to double-check the details. Ready to go? Hit Create Project to submit. It may take a few seconds — then you’ll land in your new project. Need to tweak something? Just click Previous Step to go back and make changes. |