Once your Offices are set up, the next step is to add Users to the system.
Each person who needs to log in to Pronto must have a User Account.
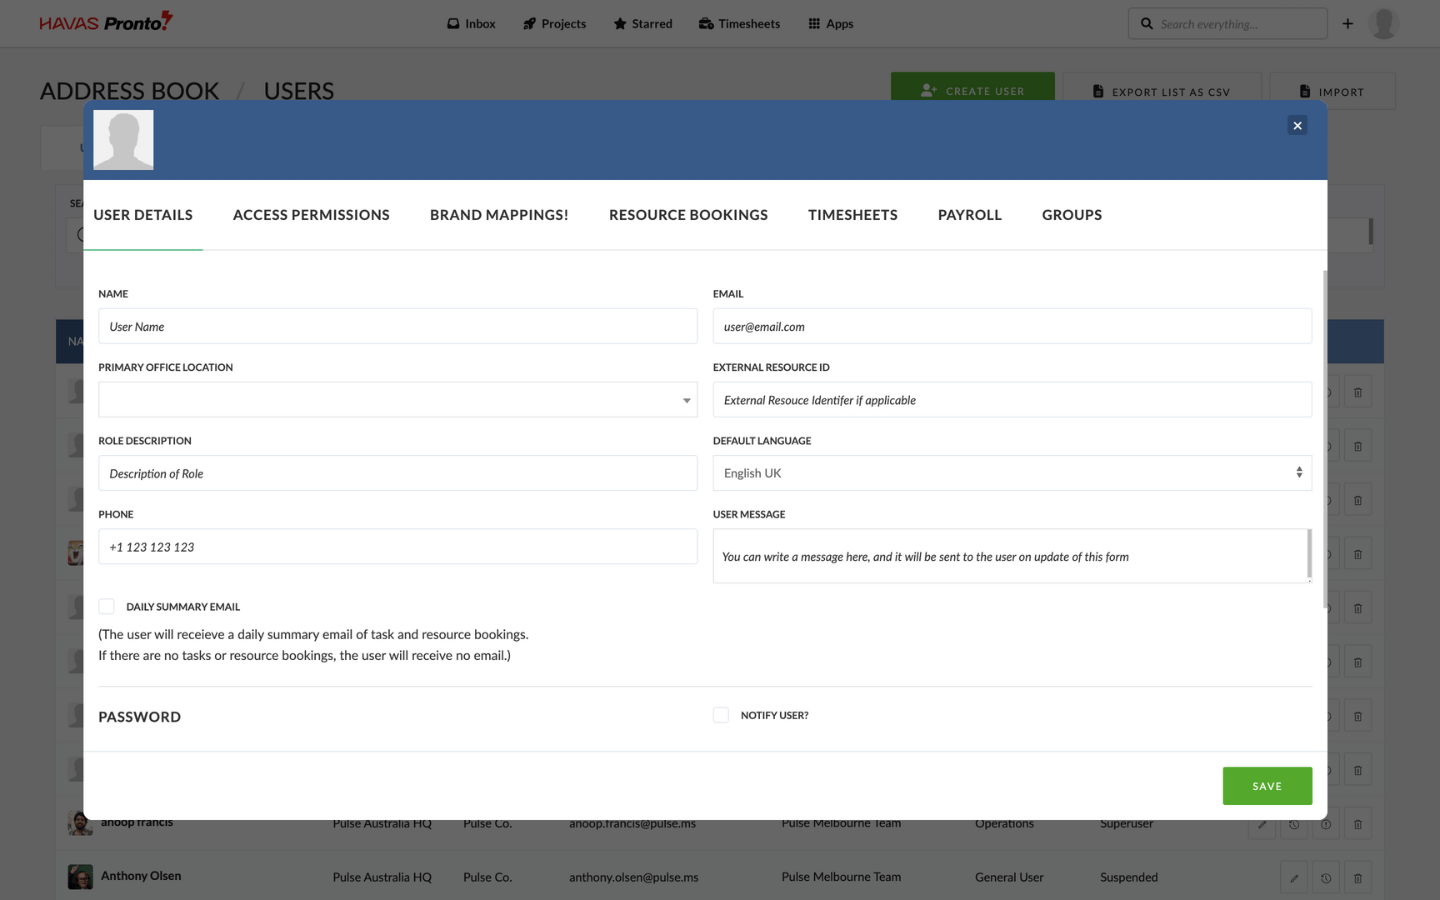
Steps to create a User Account
- Go to Address Book
- Click the Add User button
- Complete the form:
- Panel 1: Basic user info (name, email, office, etc.)
- Panel 2: Select Project Access Level and assign a Permission Profile
- Panel 3+ (optional): Configure Timesheets, Resource Planner, PTO settings
4. Click Save
Once saved, the user will receive a New User Email with login details — unless you choose to disable this option during setup.
Notes on creating Users:
- Make sure the Office exists before creating the User
- You can choose to suppress the welcome email at the bottom of panel one
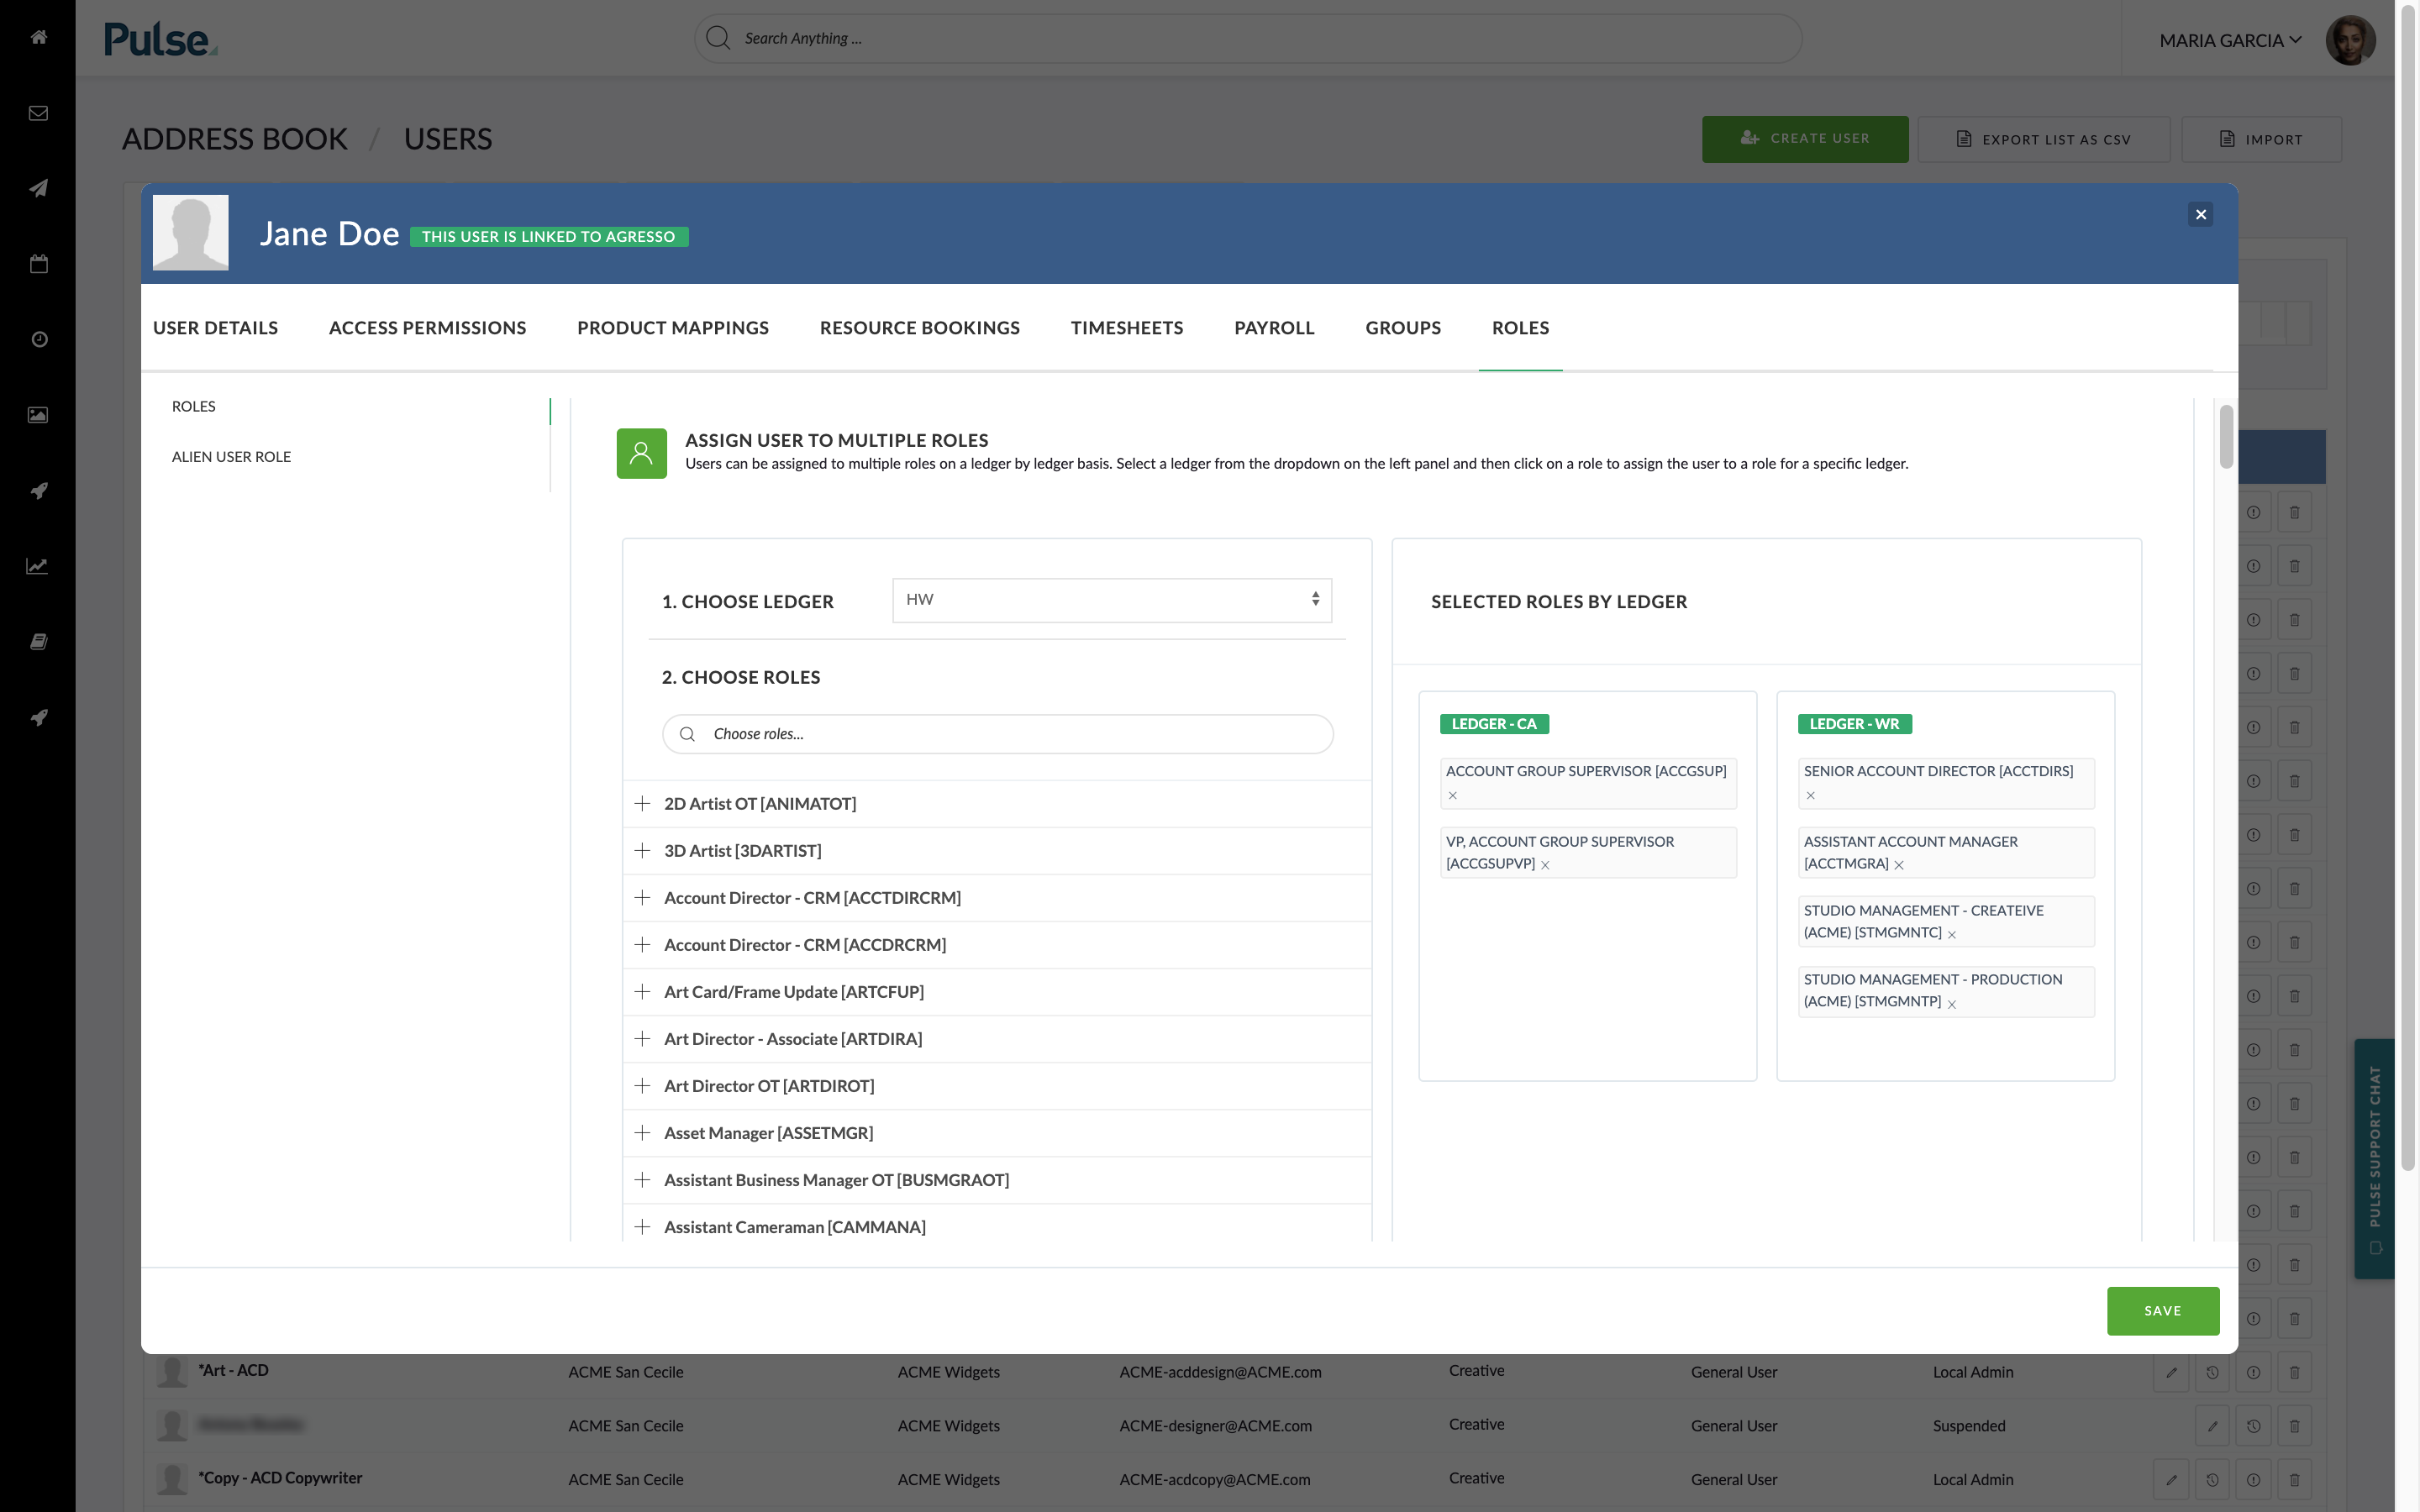
- If the user is linked to Agresso, extra role configuration options will appear
For more advanced setup guidance, refer to the Address Book Feature Training Module in the Pronto Learning Academy.