1. Import Tasks to Timeline
From the Gantt view, click the Ellipsis (⋯) menu and select Import Project Tasks.
This opens the Import Tasks to Timeline modal.
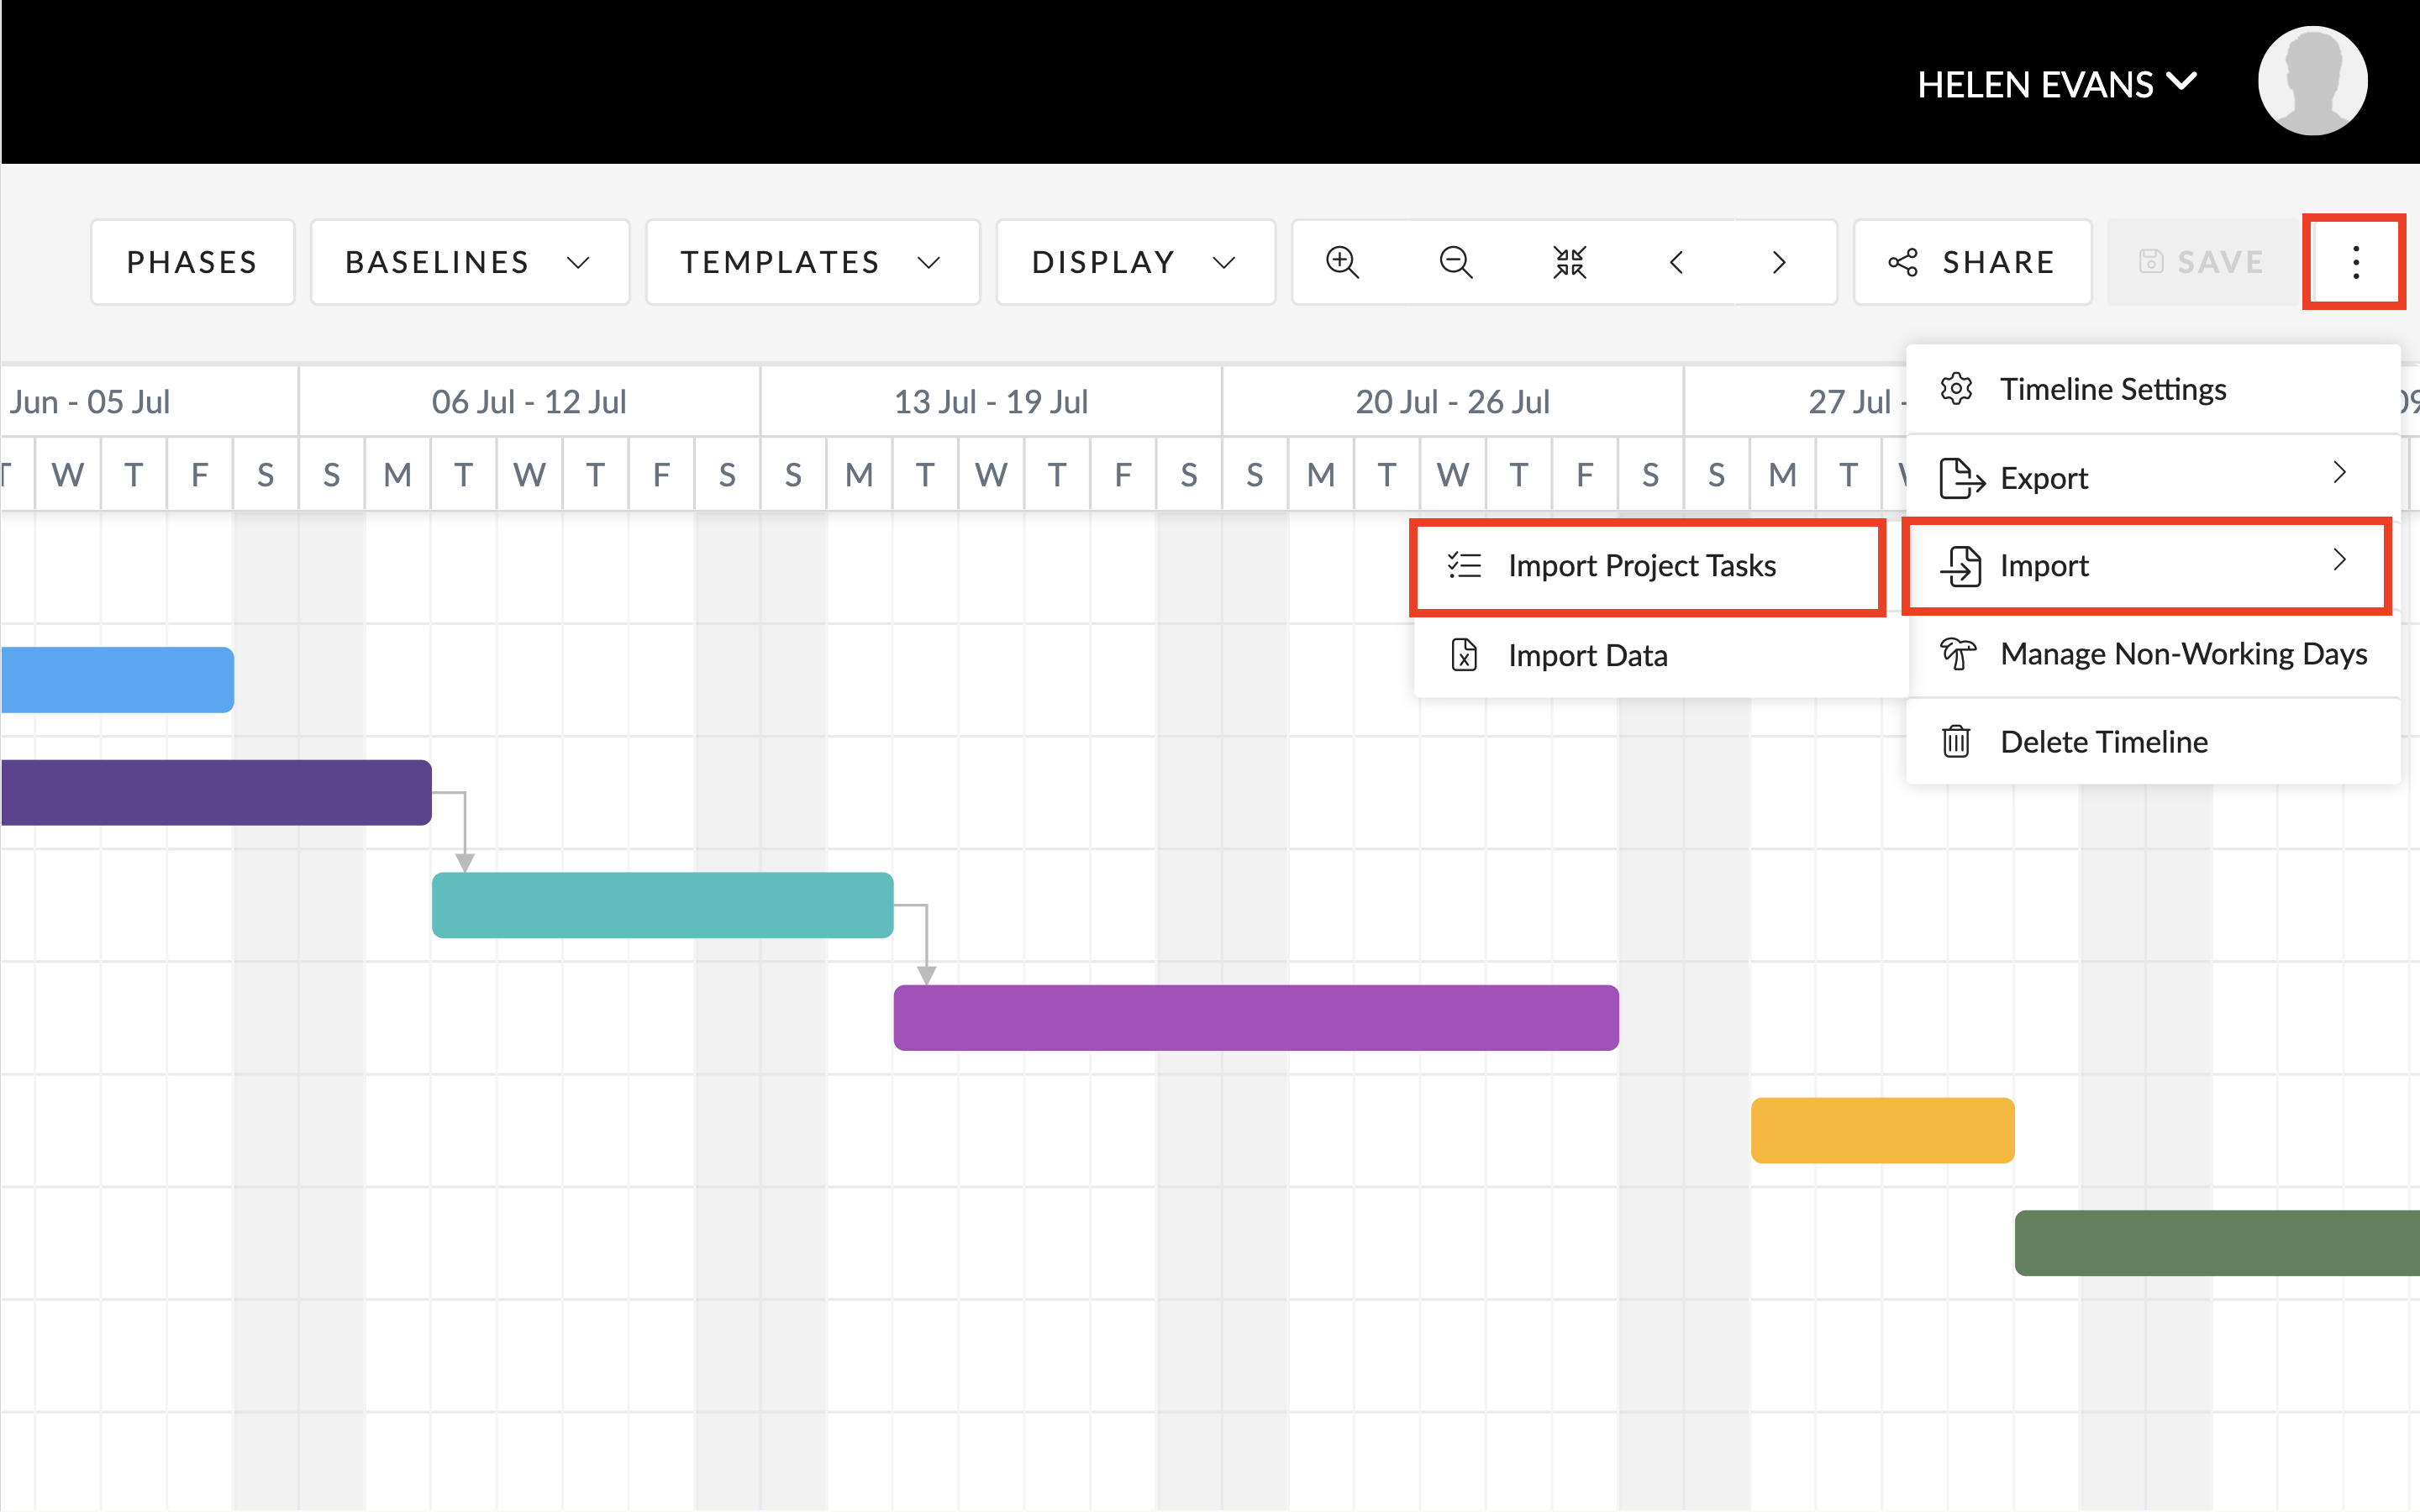
2. Select Import Project Tasks.
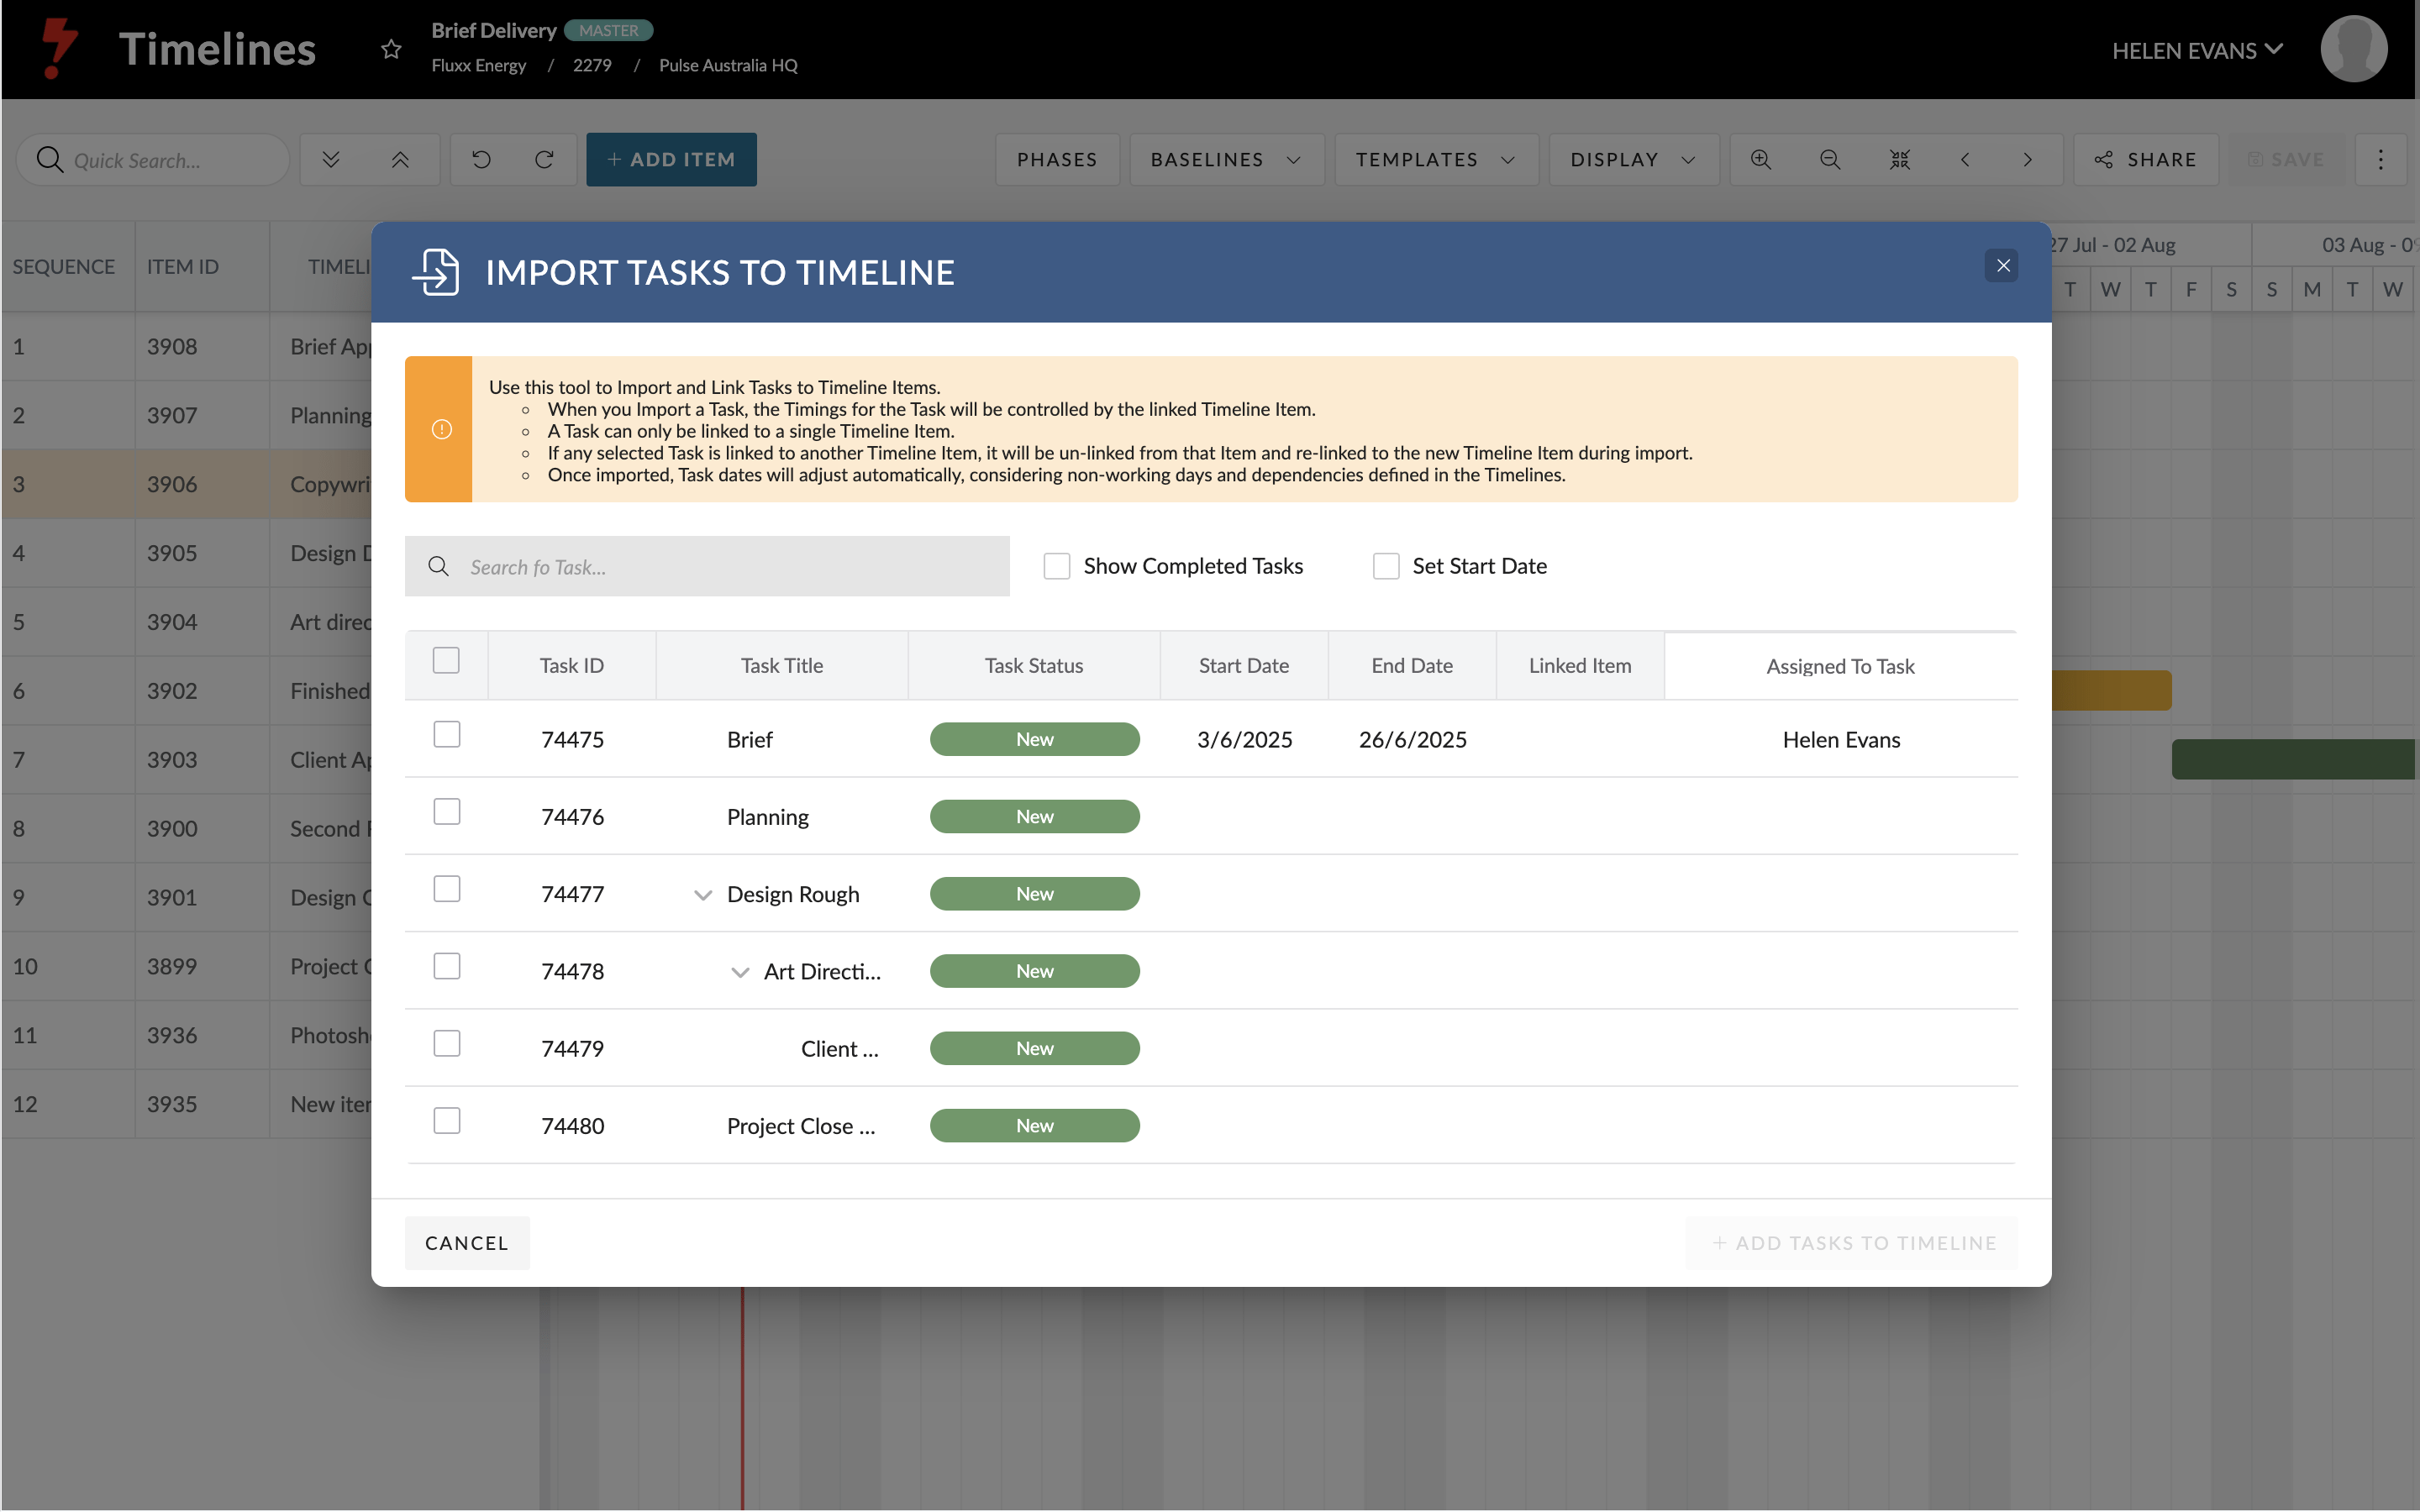
In the import modal you can:
- Select one or multiple tasks to import.
- Search for tasks by name.
- Choose to display completed or deleted tasks if needed.
3. Set a start date for the imported tasks.

4. Choose whether to:
- Chain tasks – each task will follow the previous one, using the default duration (3 days).
- Unchained – all tasks start on the same date with the default duration.
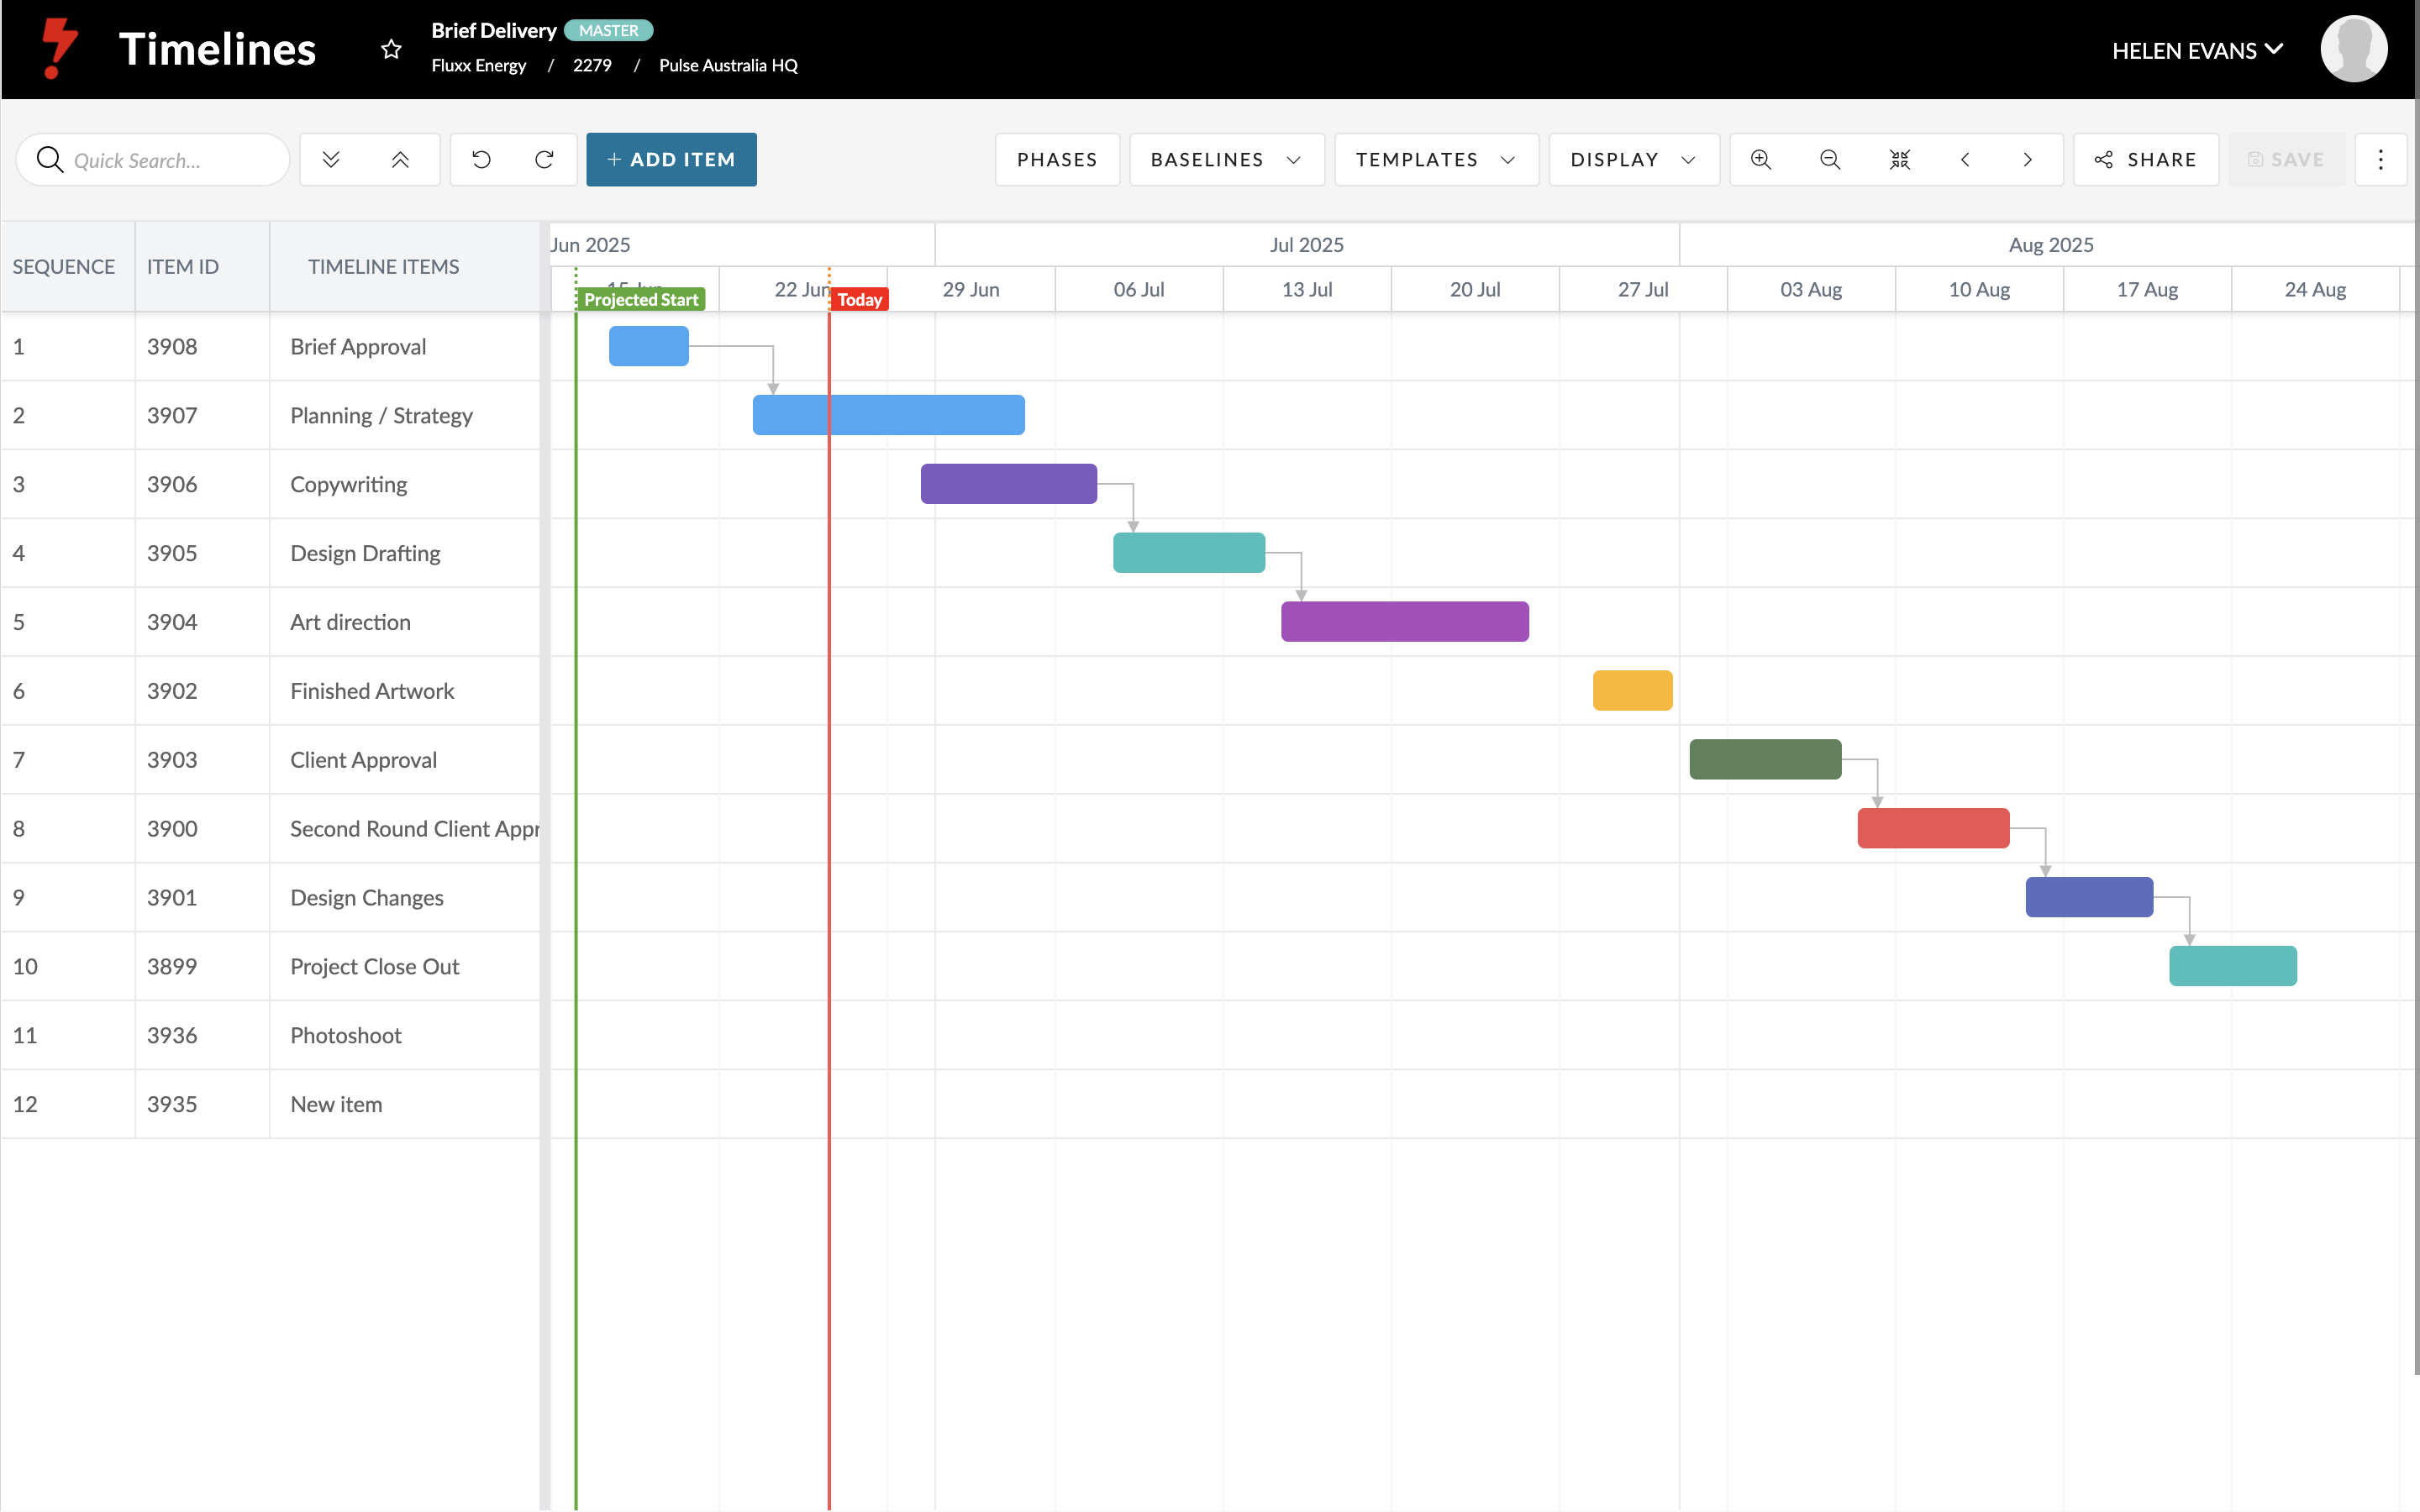
5. Click Import. Tasks appear in the Timeline with their parent/child structure.
Editing and Managing Imported Tasks
- Parents vs children
- Parent tasks display as non-editable bars in the Timeline.
- Child and grandchild tasks are editable. You can move or resize them directly on the Timeline.
- Parent tasks display as non-editable bars in the Timeline.
- Predecessor-successor relationships
- Linked tasks will show dependencies. For example, if Task A finishes, Task B begins.
- Linked tasks will show dependencies. For example, if Task A finishes, Task B begins.
- Linked tasks
- The Link Task column shows which tasks are connected to the Timeline.
- Linked tasks display a green date field in the Task list. Hovering shows the linked Timeline and project details.
- You can unlink tasks by clicking the unlink button, this keeps the dates but removes the connection.
- The Link Task column shows which tasks are connected to the Timeline.